Winnie the Pooh -- 6 to 7 hours -- Can$ 5 -- Beginner
When I was a kid I got sometimes a cardboard clown that you put together, and when you pulled on a string his arms and legs would swing out. I guess in English these are called "jumping Jacks". This got me thinking and here is the result of a figure I made from left-over plywood; total height about 12½"
Pictures
Click on a picture to get a larger picture and then used the back button of the browser to return.
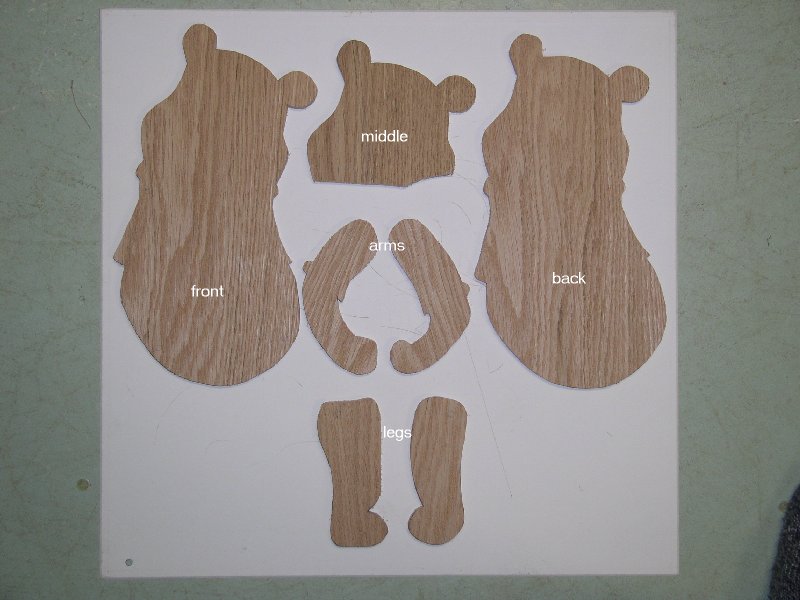
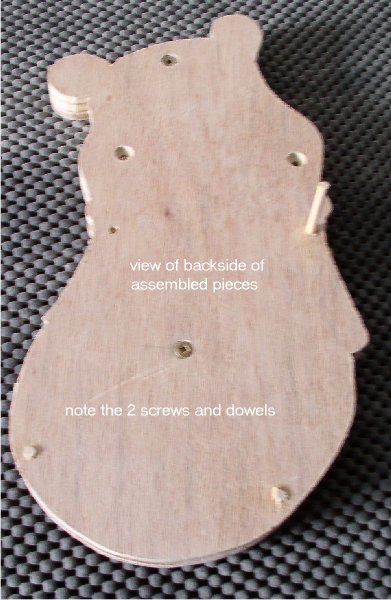
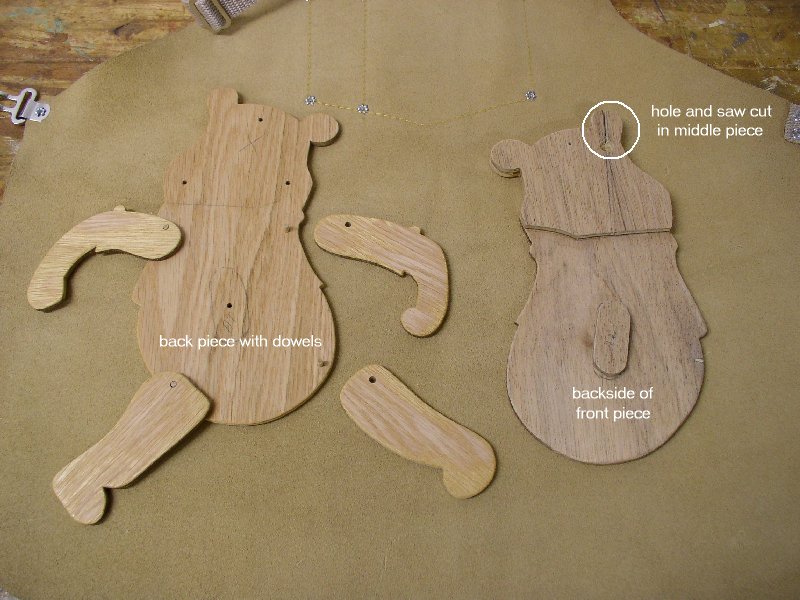
Individual pieces, but with the oval spacer piece missing.Pre-assembled for sanding and gluing the dowels in place.Sealer applied before painting.
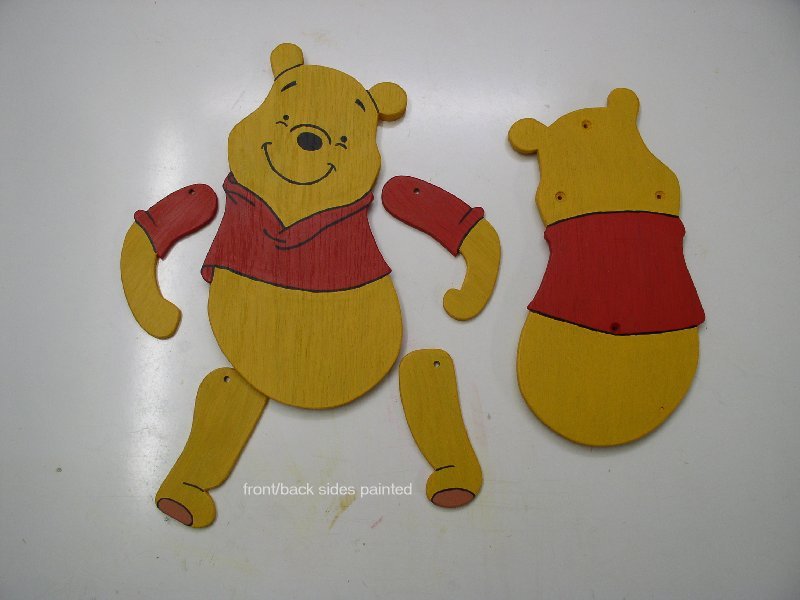
Results of my painting efforts.Inside look with strings in place.Finished product.
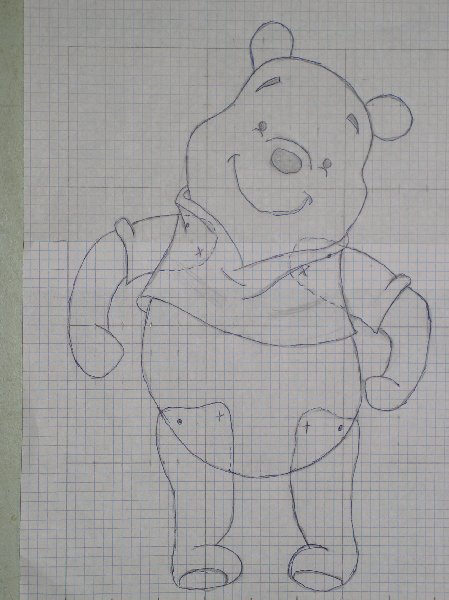
Plans, Drawings, Sketches (inches)
Copy any kind of figure or animal, enlarge it to the desired size. I made a copy of Winnie the Pooh. Mark the pivot points for arms and legs, those are the black dots. I recommend that you make a cardboard stencil first and place the arms and legs on the body with pins so that the proper movement can be checked. The stencils are handy for tracing the pattern onto plywood as well.
Materials List (inches)
Just a left-over 24" by 7" piece of ¼" plywood, a few inches of ¼" dowel, some carpenters glue, four flat-headed ½" screws, four ½" eyelets and some string.
Required Tools
Power tools -- drill press.
Hand tools -- scroll saw.
Construction
Transfer the drawing outlines onto the plywood. Saw the individual pieces with a scroll saw. Drill four holes in the back piece and countersink them. Drill the four holes for the ¼" dowels in the back piece where the arms and legs are pivoting. Glue the middle piece and the oval spacer piece against the back of the front piece. Once the glue is dry drill a shallow in the middle piece and cut a small groove from that hole to the top. Screw the back piece against the back of the pre-assembled front piece with the top and the bottom screws.
If you make more than one, like I did, then this is the right time to mark each piece as belonging to a particular figure. Using a small diameter drumsander in the drill press sand the sides of body, arms and legs as far as possible. Take a small filler piece of the thickness of the arms and legs plus two sheets of paper. Slide it between the back and front piece close to a pivot point. Glue the dowel piece into the hole while pushing it against the front. Once the glue is dry cut off the excess. Repeat for the other three holes.
Sand the arms and legs taking a bit off from the top and the bottom. Check that they fit loosely between the back and front pieces. Finish sanding the sides where the drumsander could not reach. Finally roundover all edges. Sand the front and back of the body. Finish sanding the sides where the drumsander could not reach. Finally roundover all exposed edges.
Take out the two screws and dry-fit all pieces together. Apply a sealer to each piece, e.g. Shellac, and then colour the front and edges of each piece. I personally use Liquitex waterbased paint as it does not build up a layer like most normal paints do. Once the paint is dry spray the arms, legs and outside of front and back with a coat of clear varnish. I used quick drying Varathene Professional Clear Finish (1100 clear satin).
The last thing to do is to screw a ½" eyelet in each arm and leg, and tie a string to each eyelet and at the top so that the figure can hang on the wall. Put everything together and do a final check that everything works fine and finish it by putting in the four ½" screws on the back.