The book "Carving Classic Female Figures in Wood" by Ian Norbury I had already for many years. It was only now that I figure that I would be capable to "carve" a Female Statue. In Ian Norbury book I was attracted to the torso. However, I felt that it was too much like a study of the female body. I wanted a Female Statue from top to bottom.
There are many choices of wood to use like tupelo, basswood, etc. While deciding on the height of the statue and looking for a block of wood that I didn't have to glue up I happen to find a block of basswood of 6" x 12" x 46". It was surprising heavy weighing 22.4 kg (49.4 lbs).
Terminology is used as related to Female Statue. FRONT is her front, BACK is her back, LEFT side is her left side, and RIGHT side is her right side.
My lady friend wanted me to give the Female Statue a name.
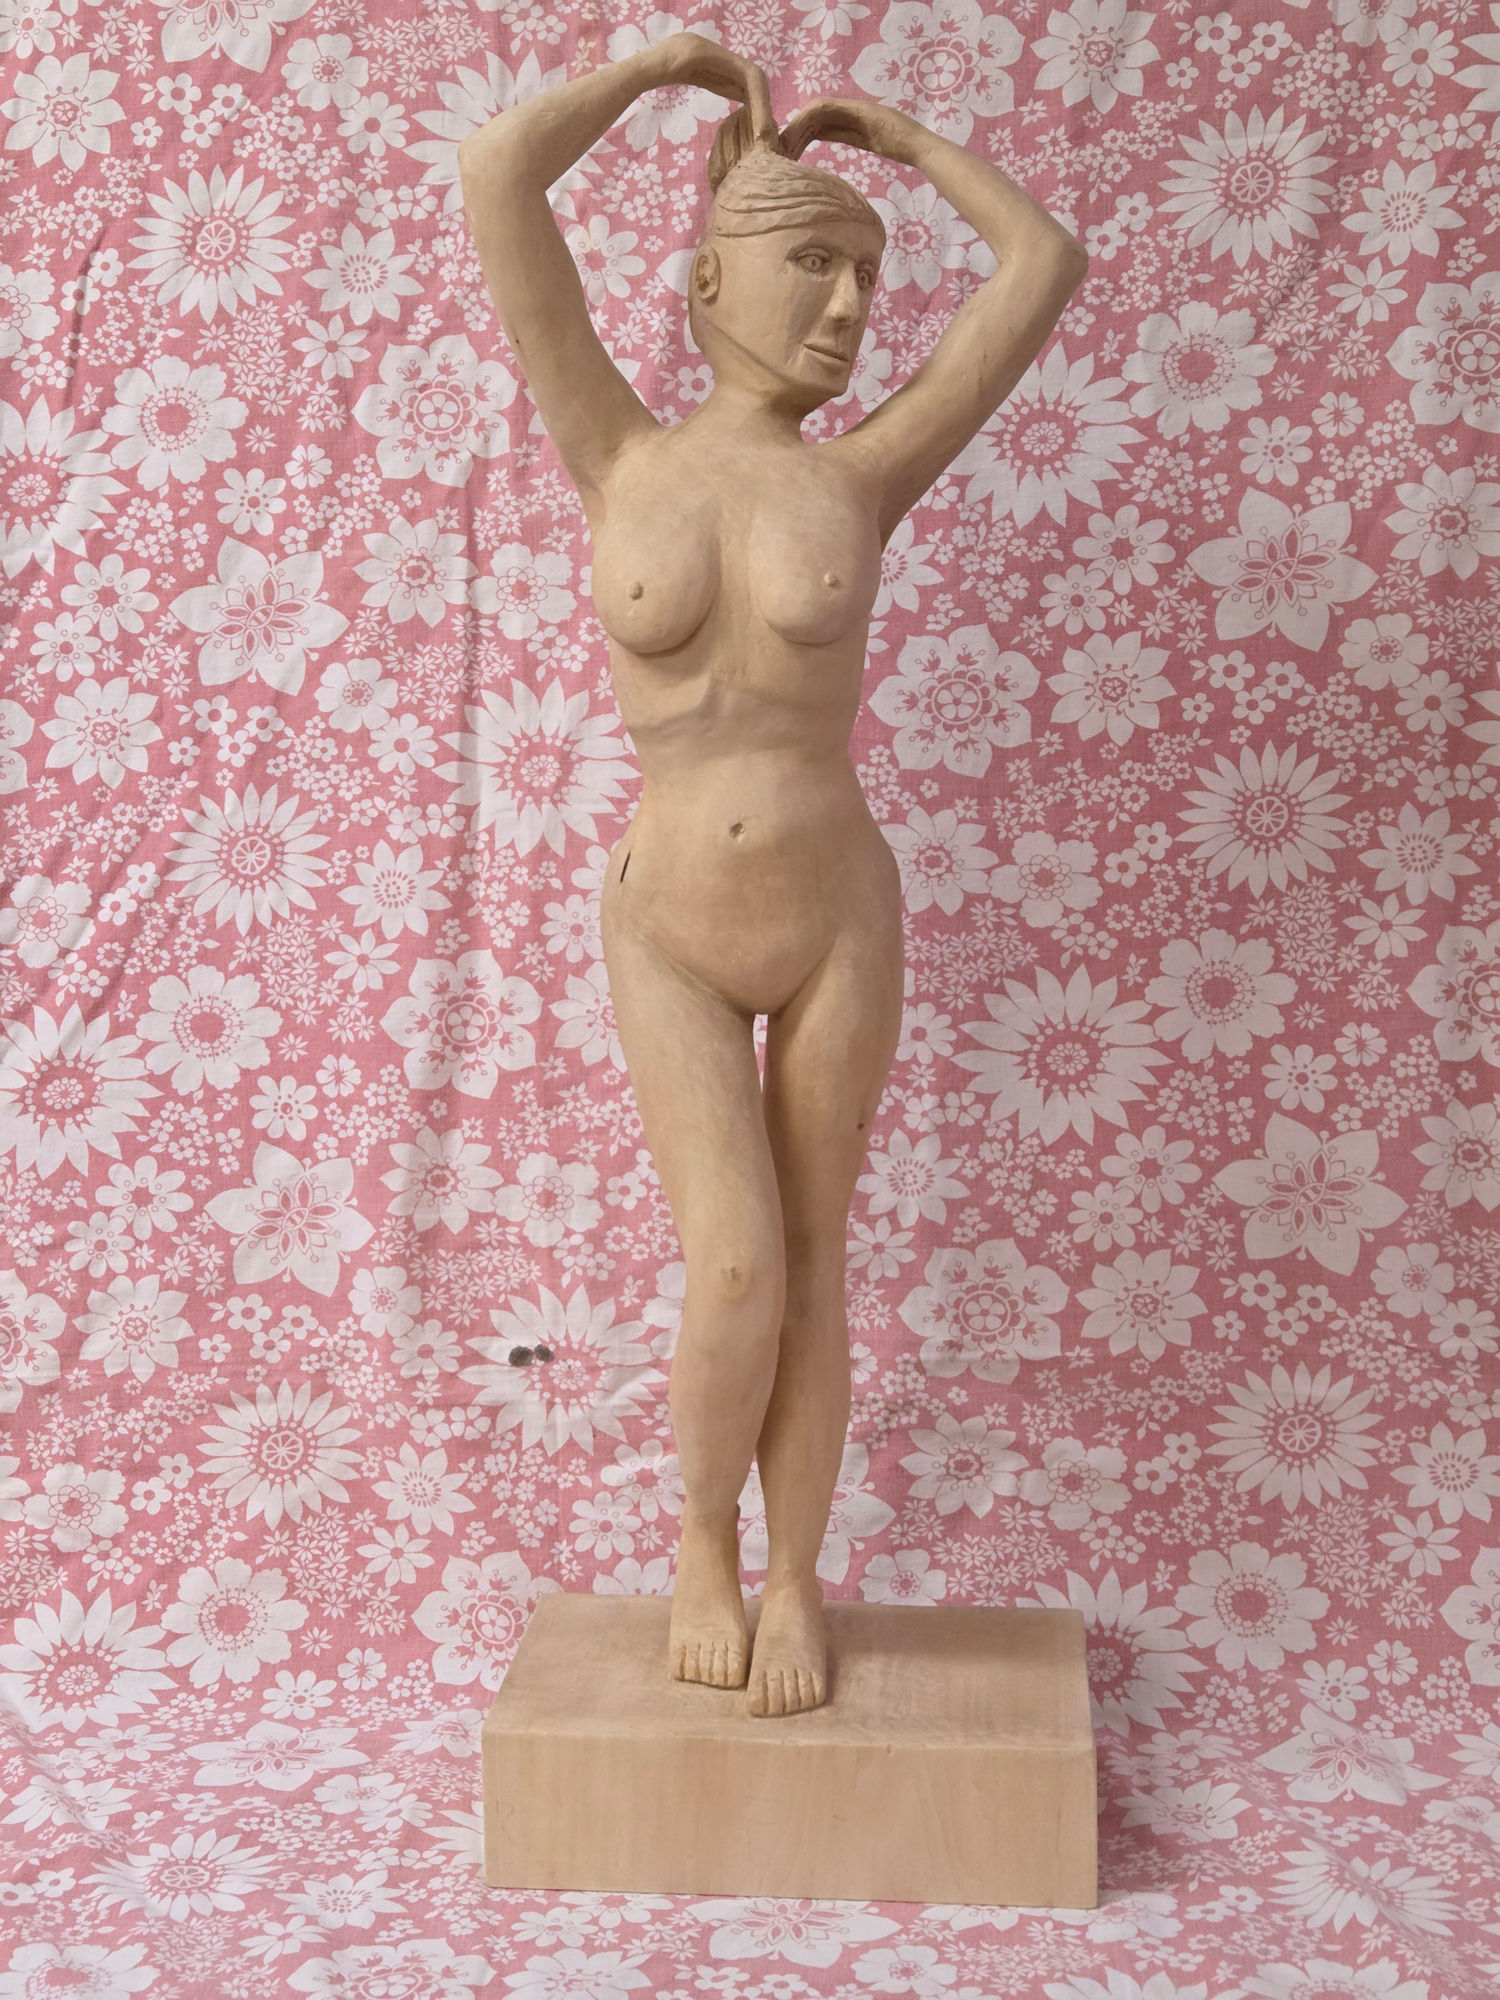
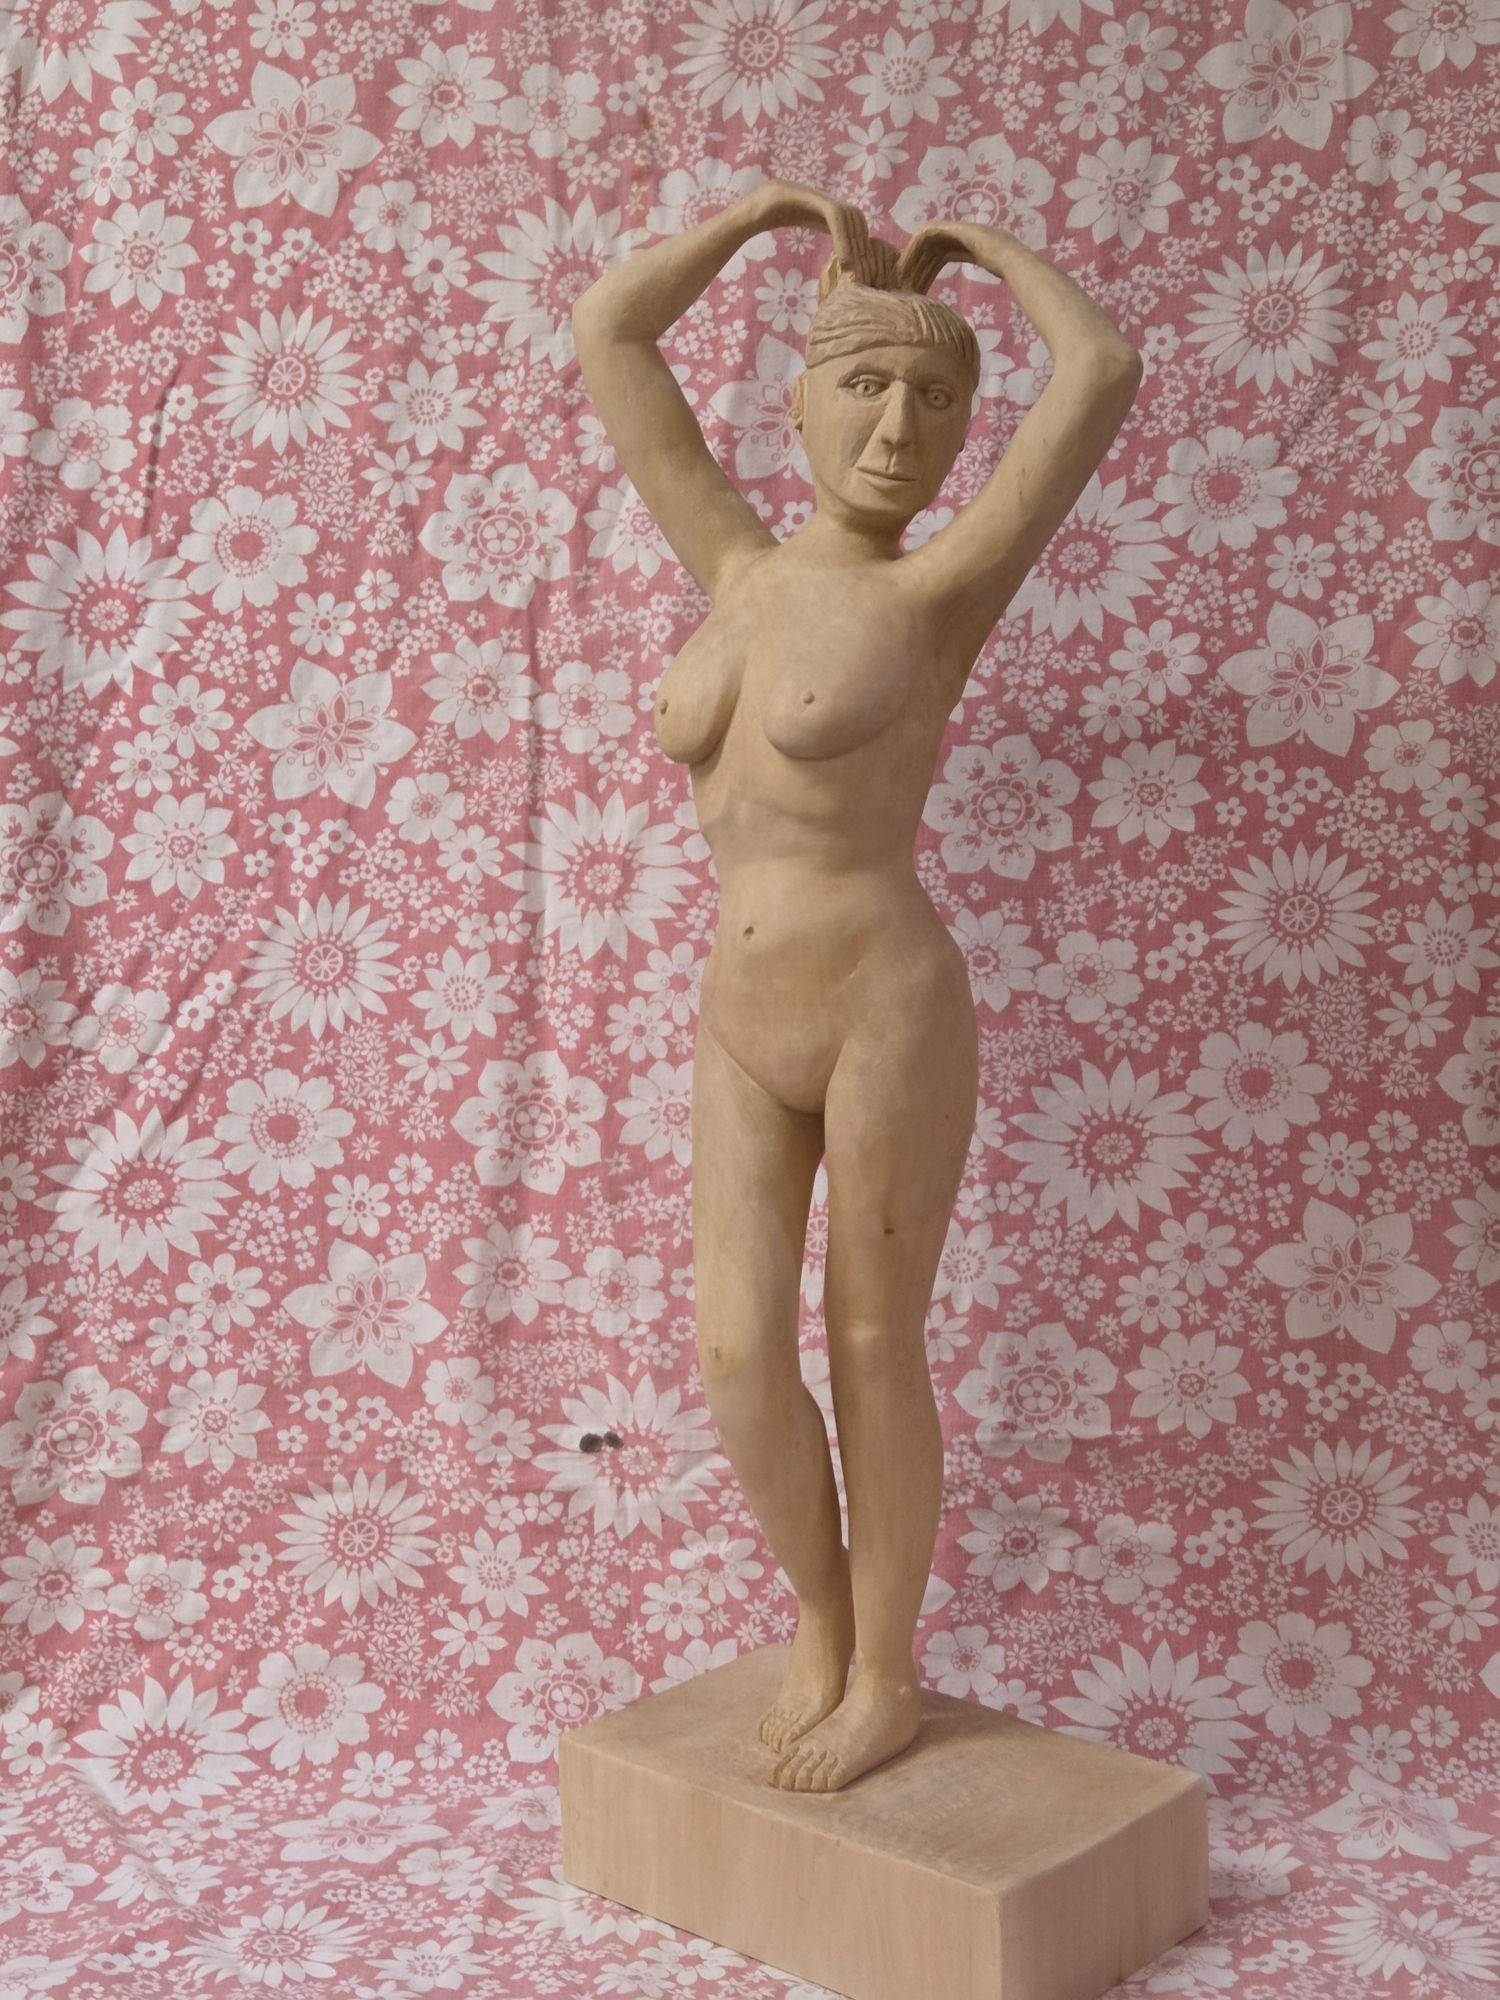
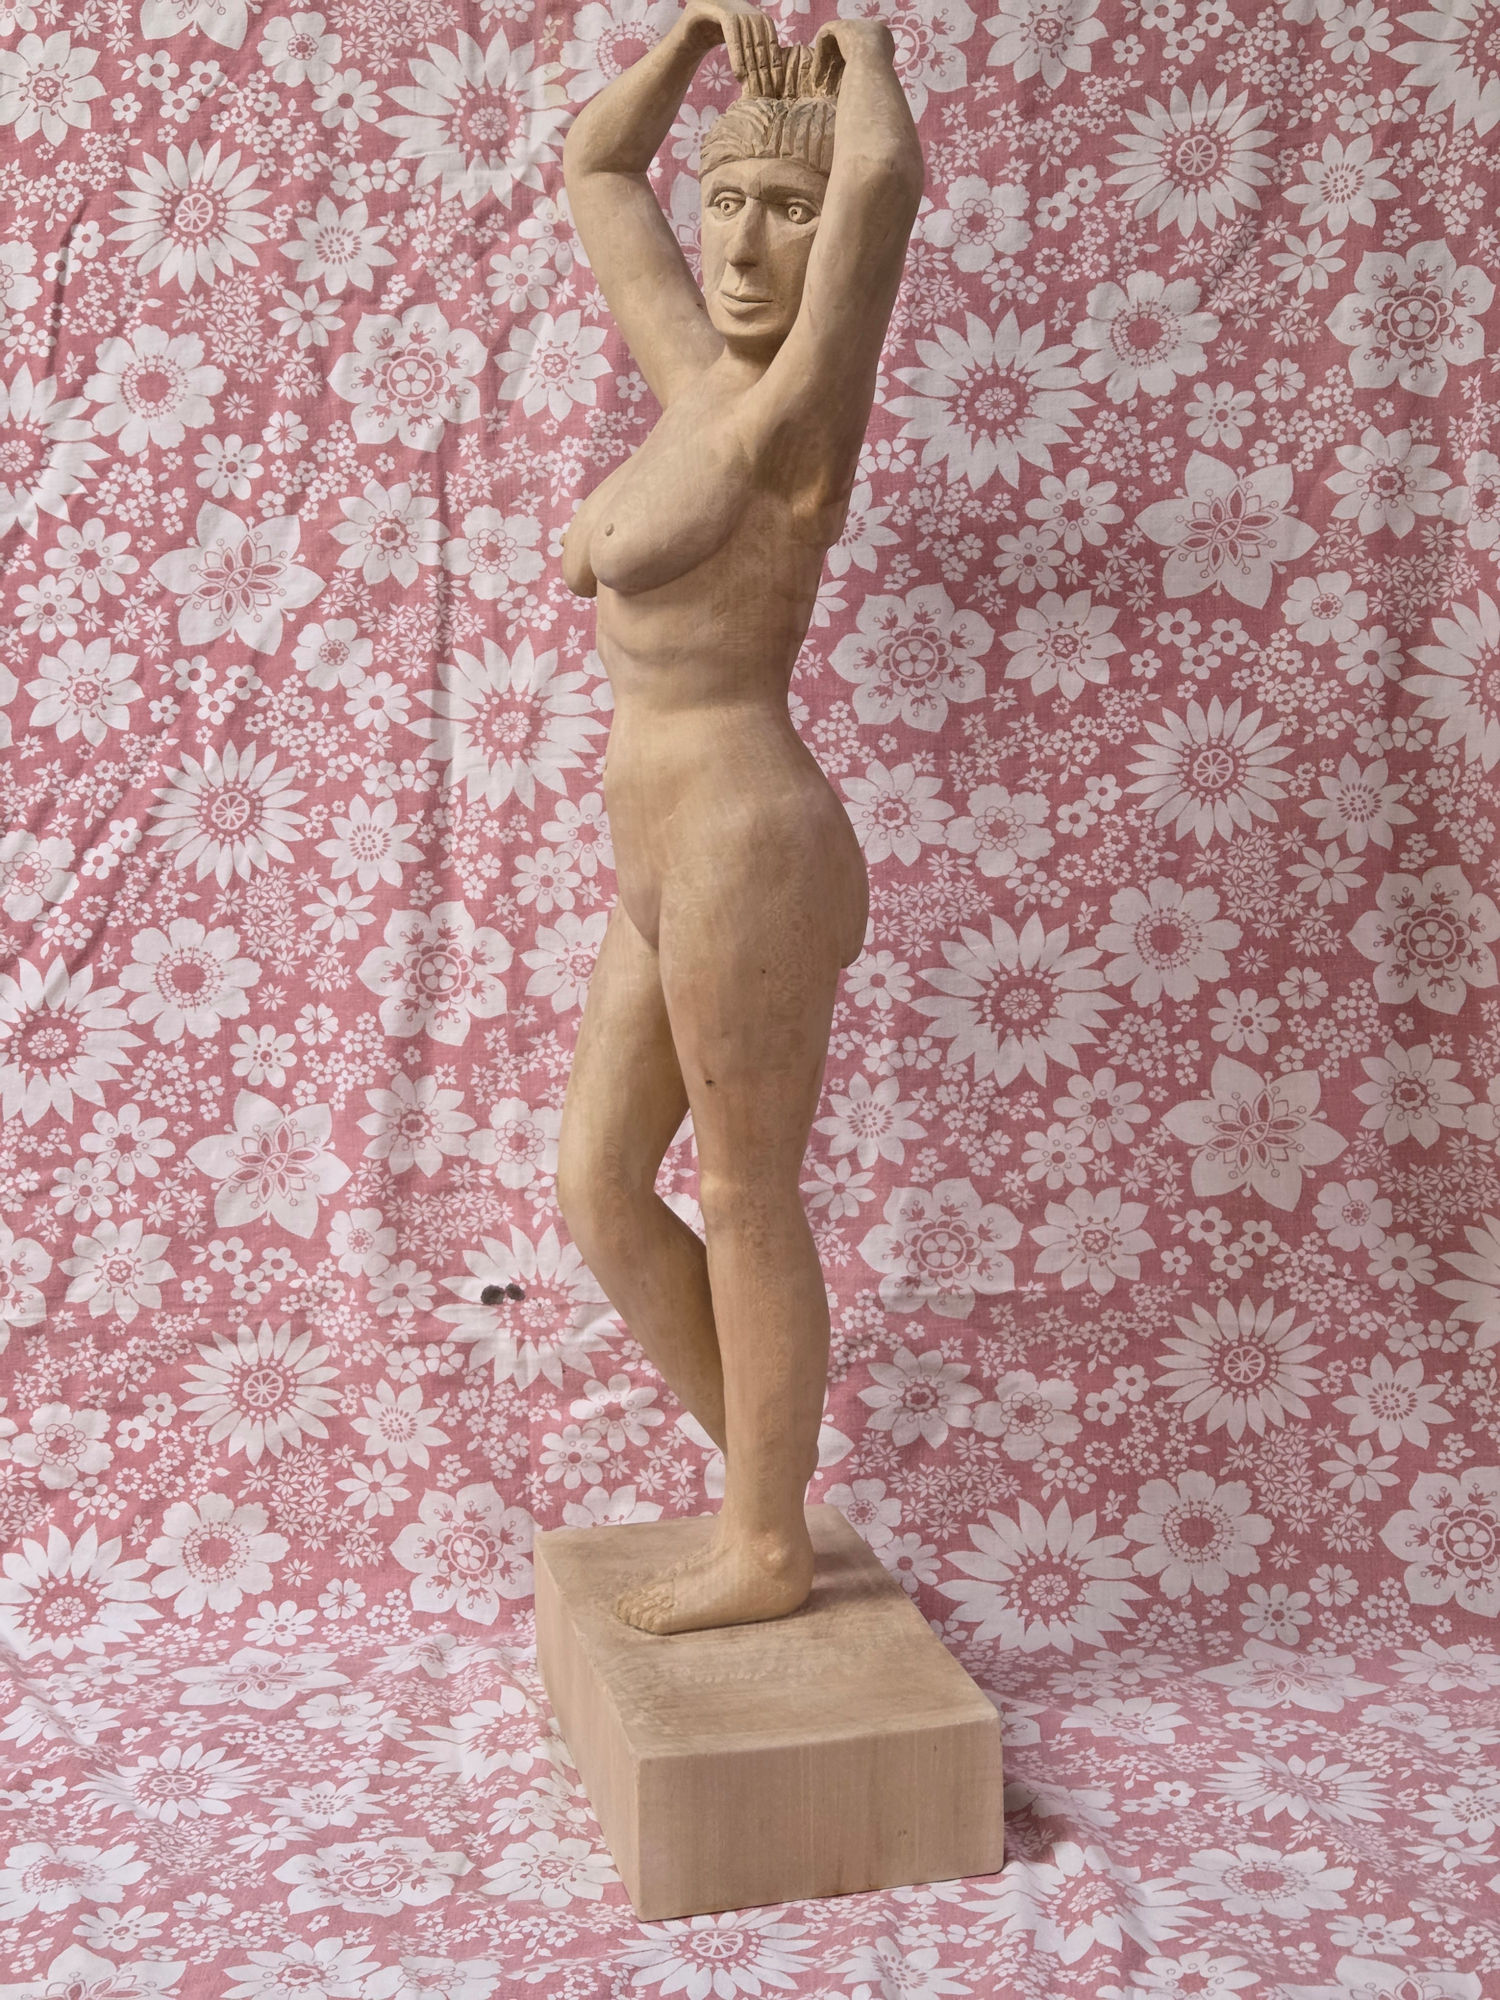
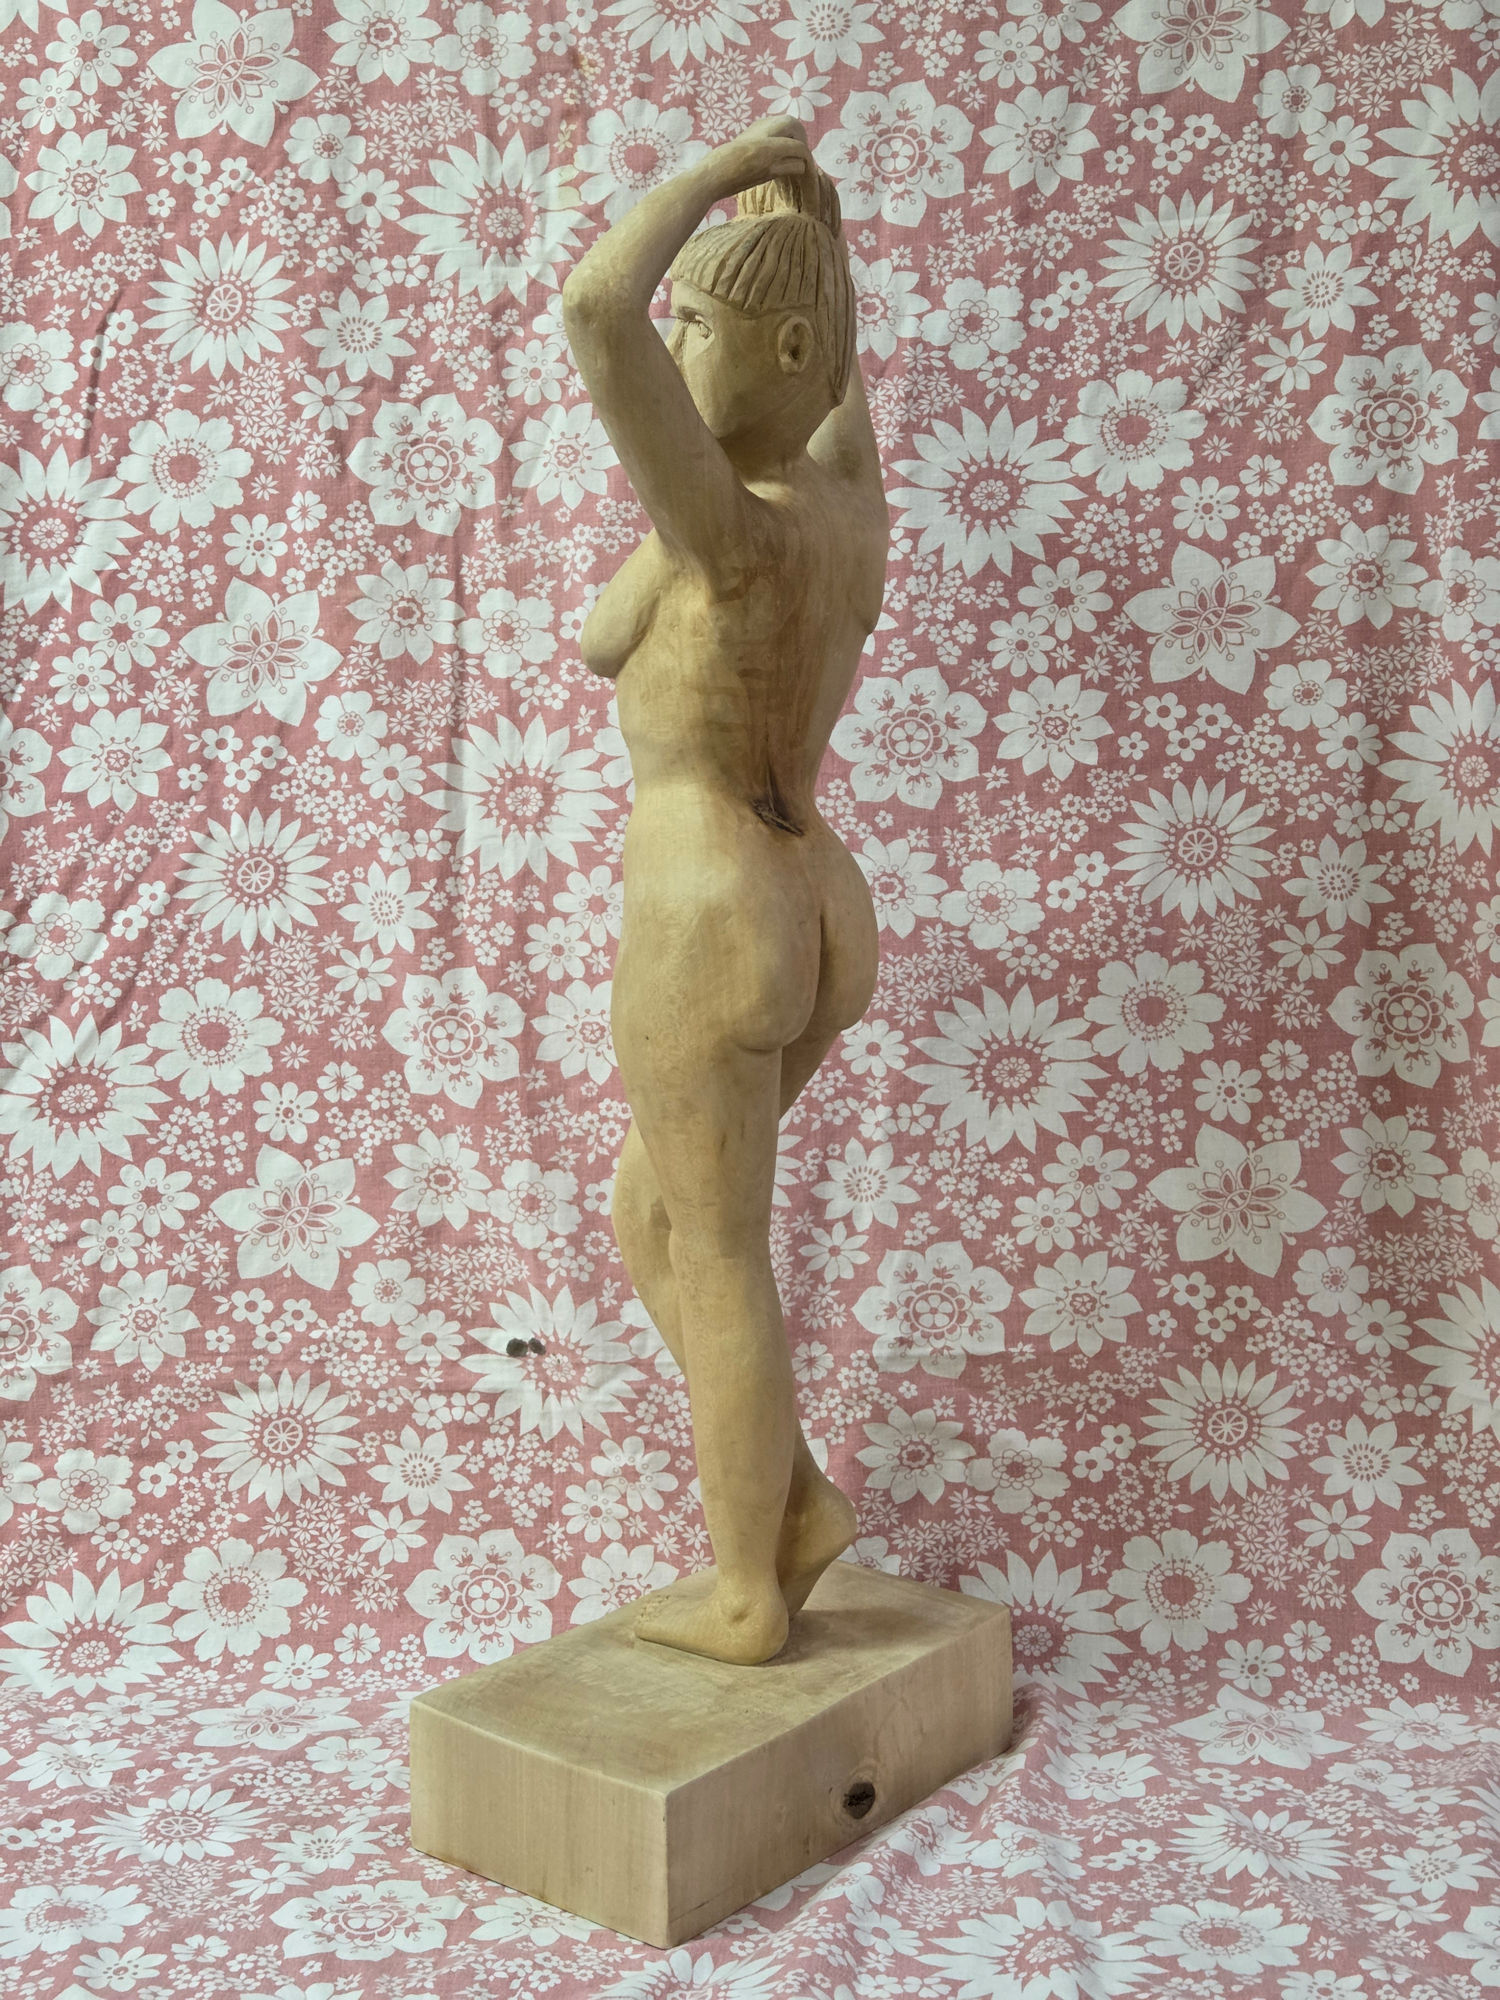
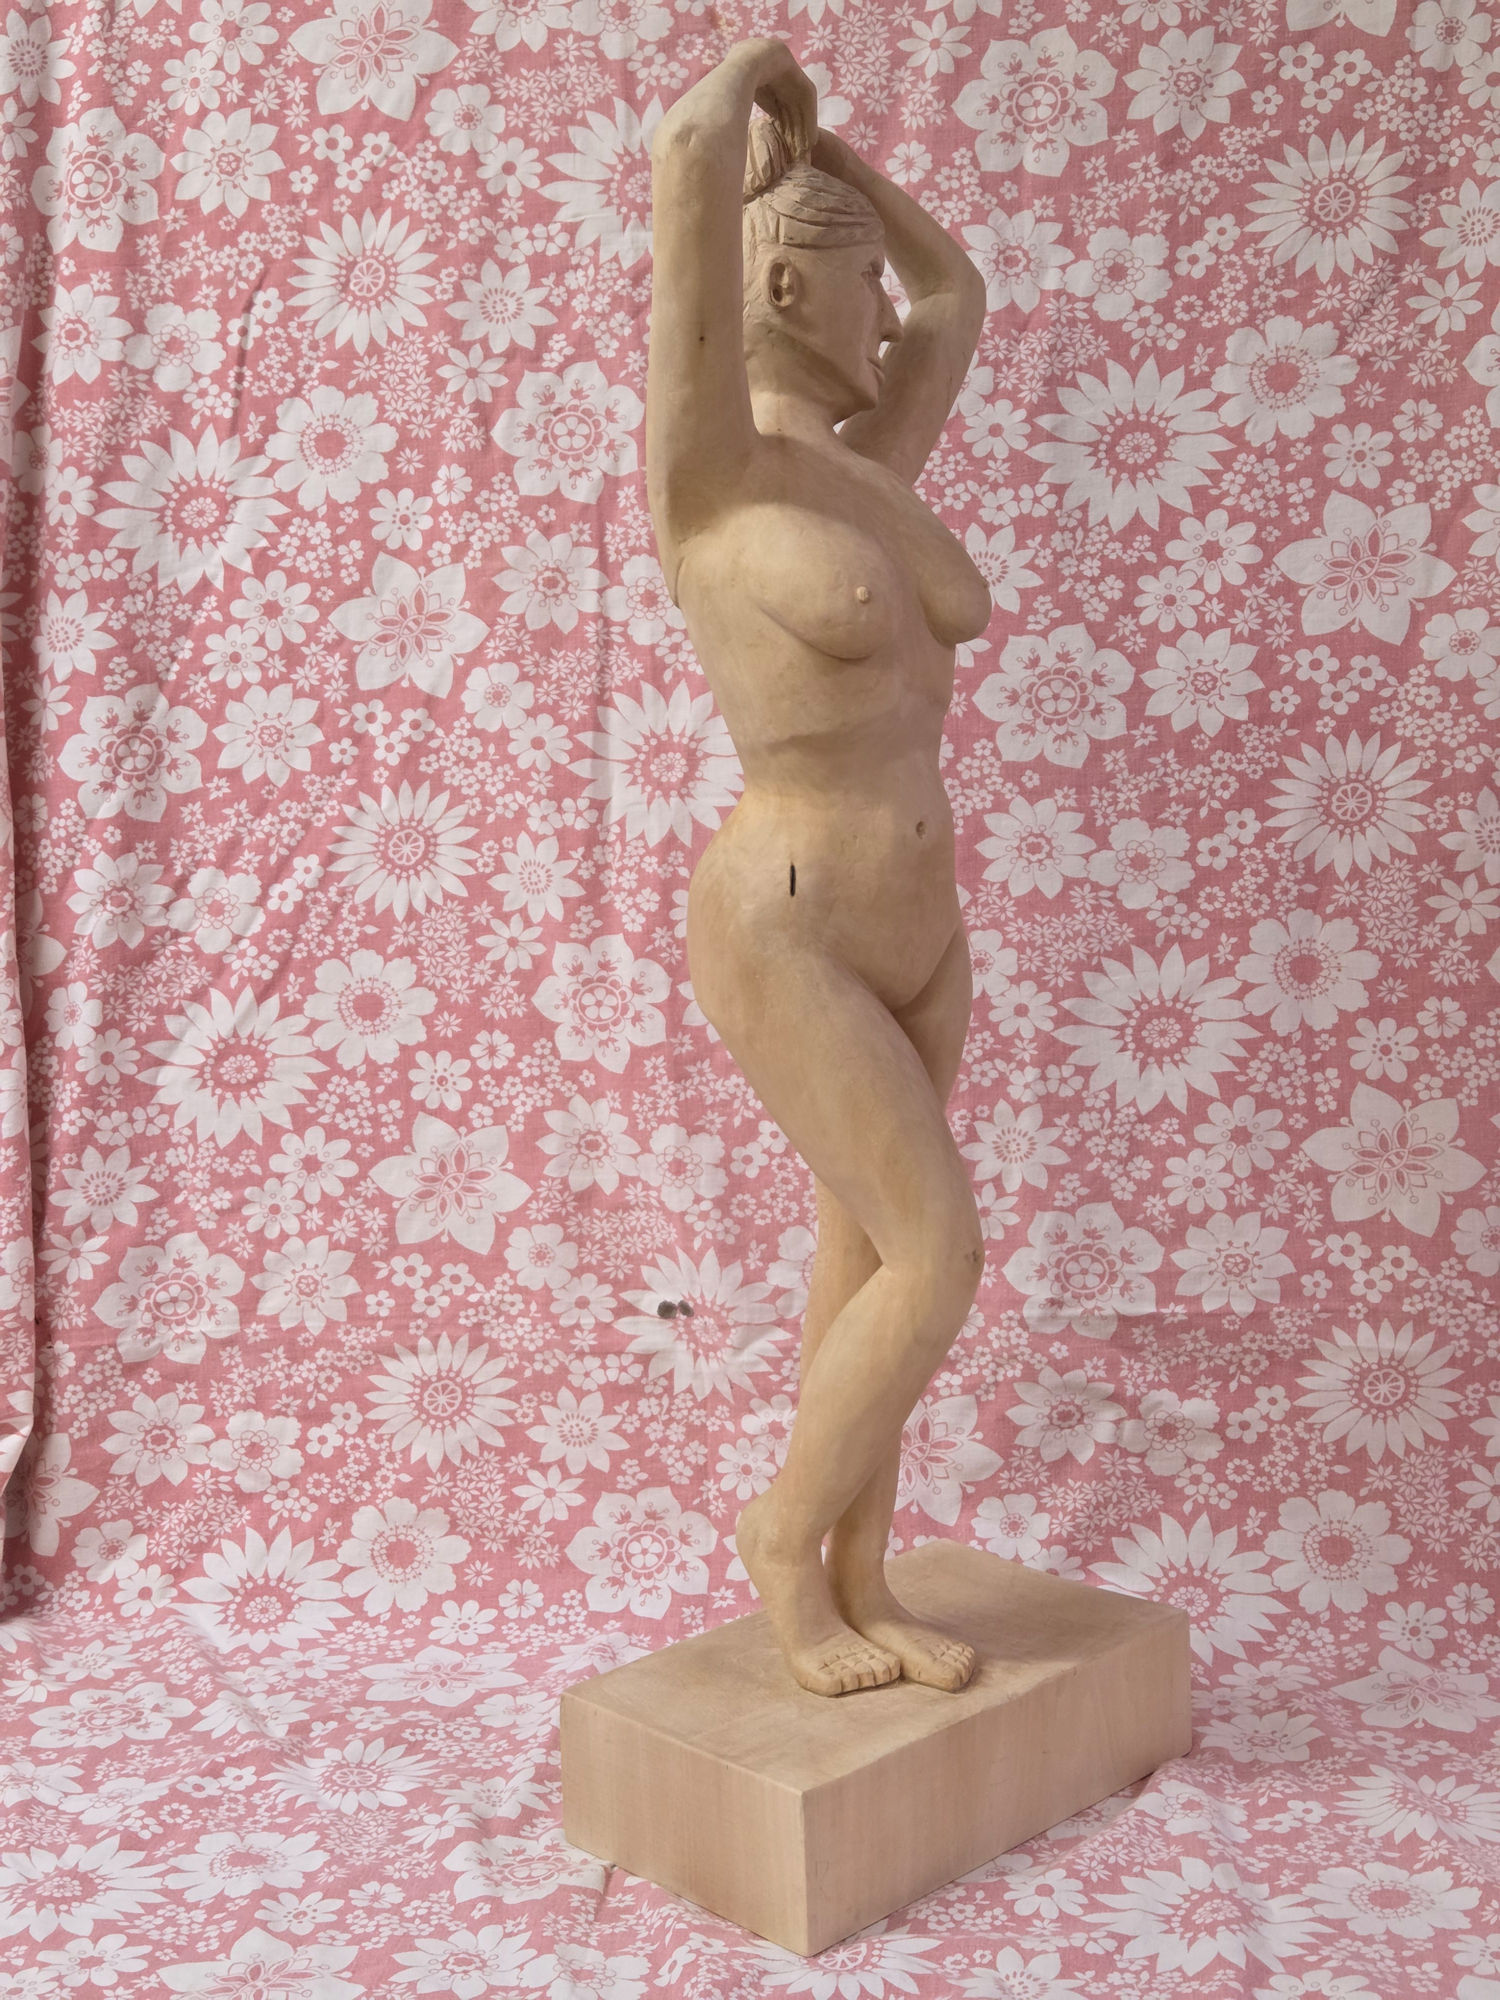
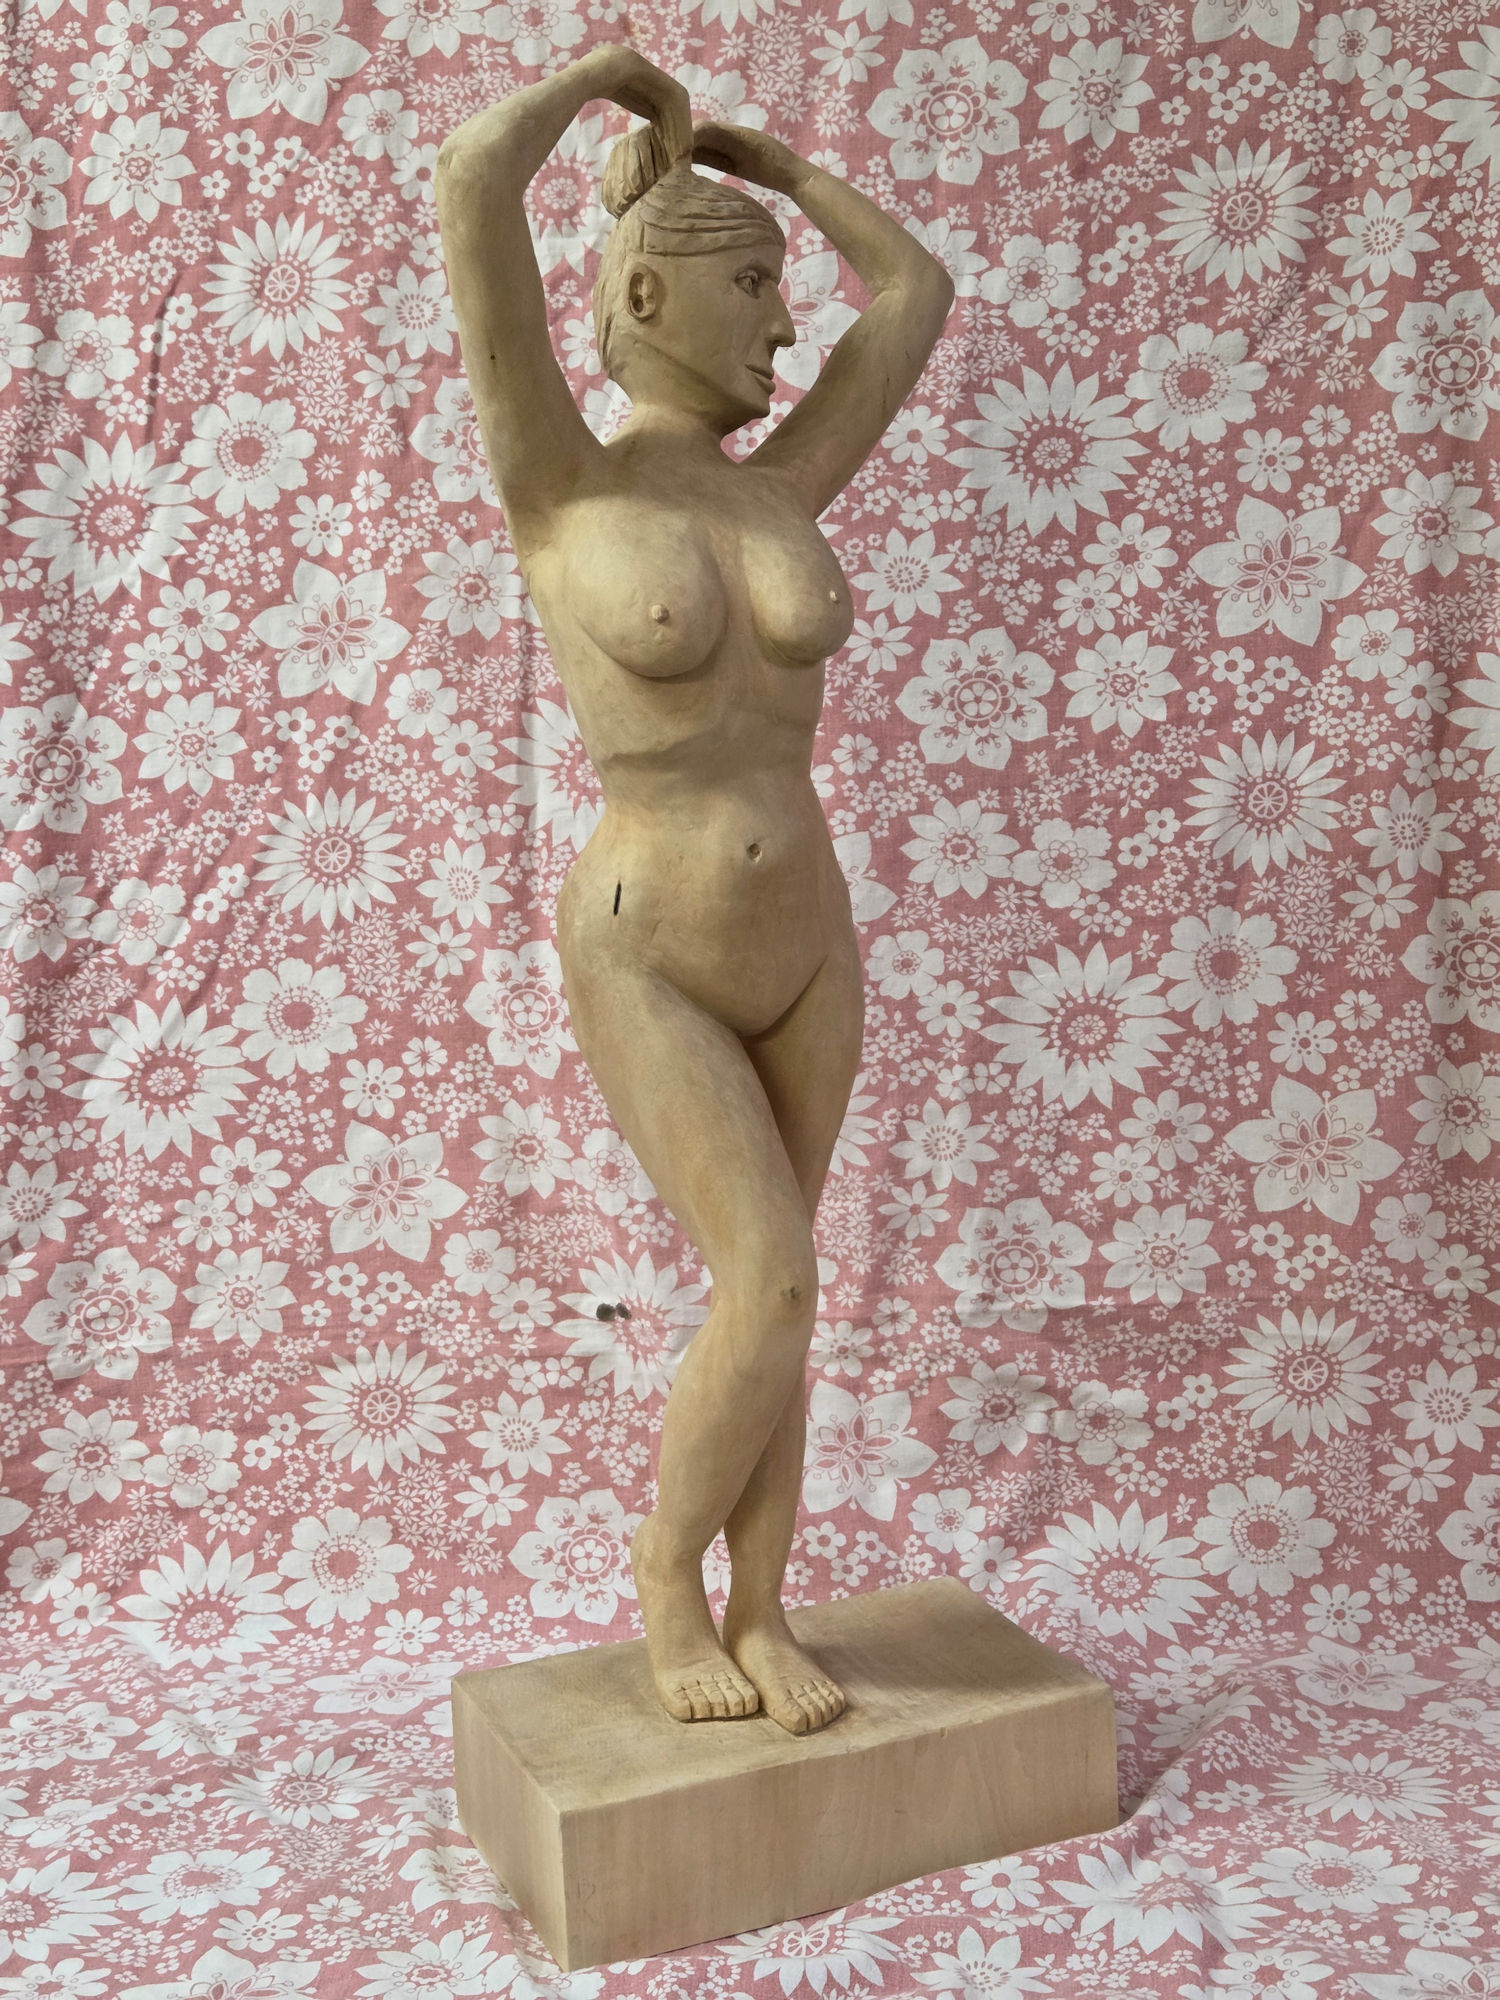
I had a vision of a lady walking through a forest with basswood trees. She ended up at a seclude open space where the spring sun shines. She took of her clothes, loosened her long hair, plaited her hair in a top bun while enjoying the spring sunshine on her body.
I decided to call her Lady Basswood.
Pictures
Click on a picture to get a larger picture and then used the back button of the browser to return.
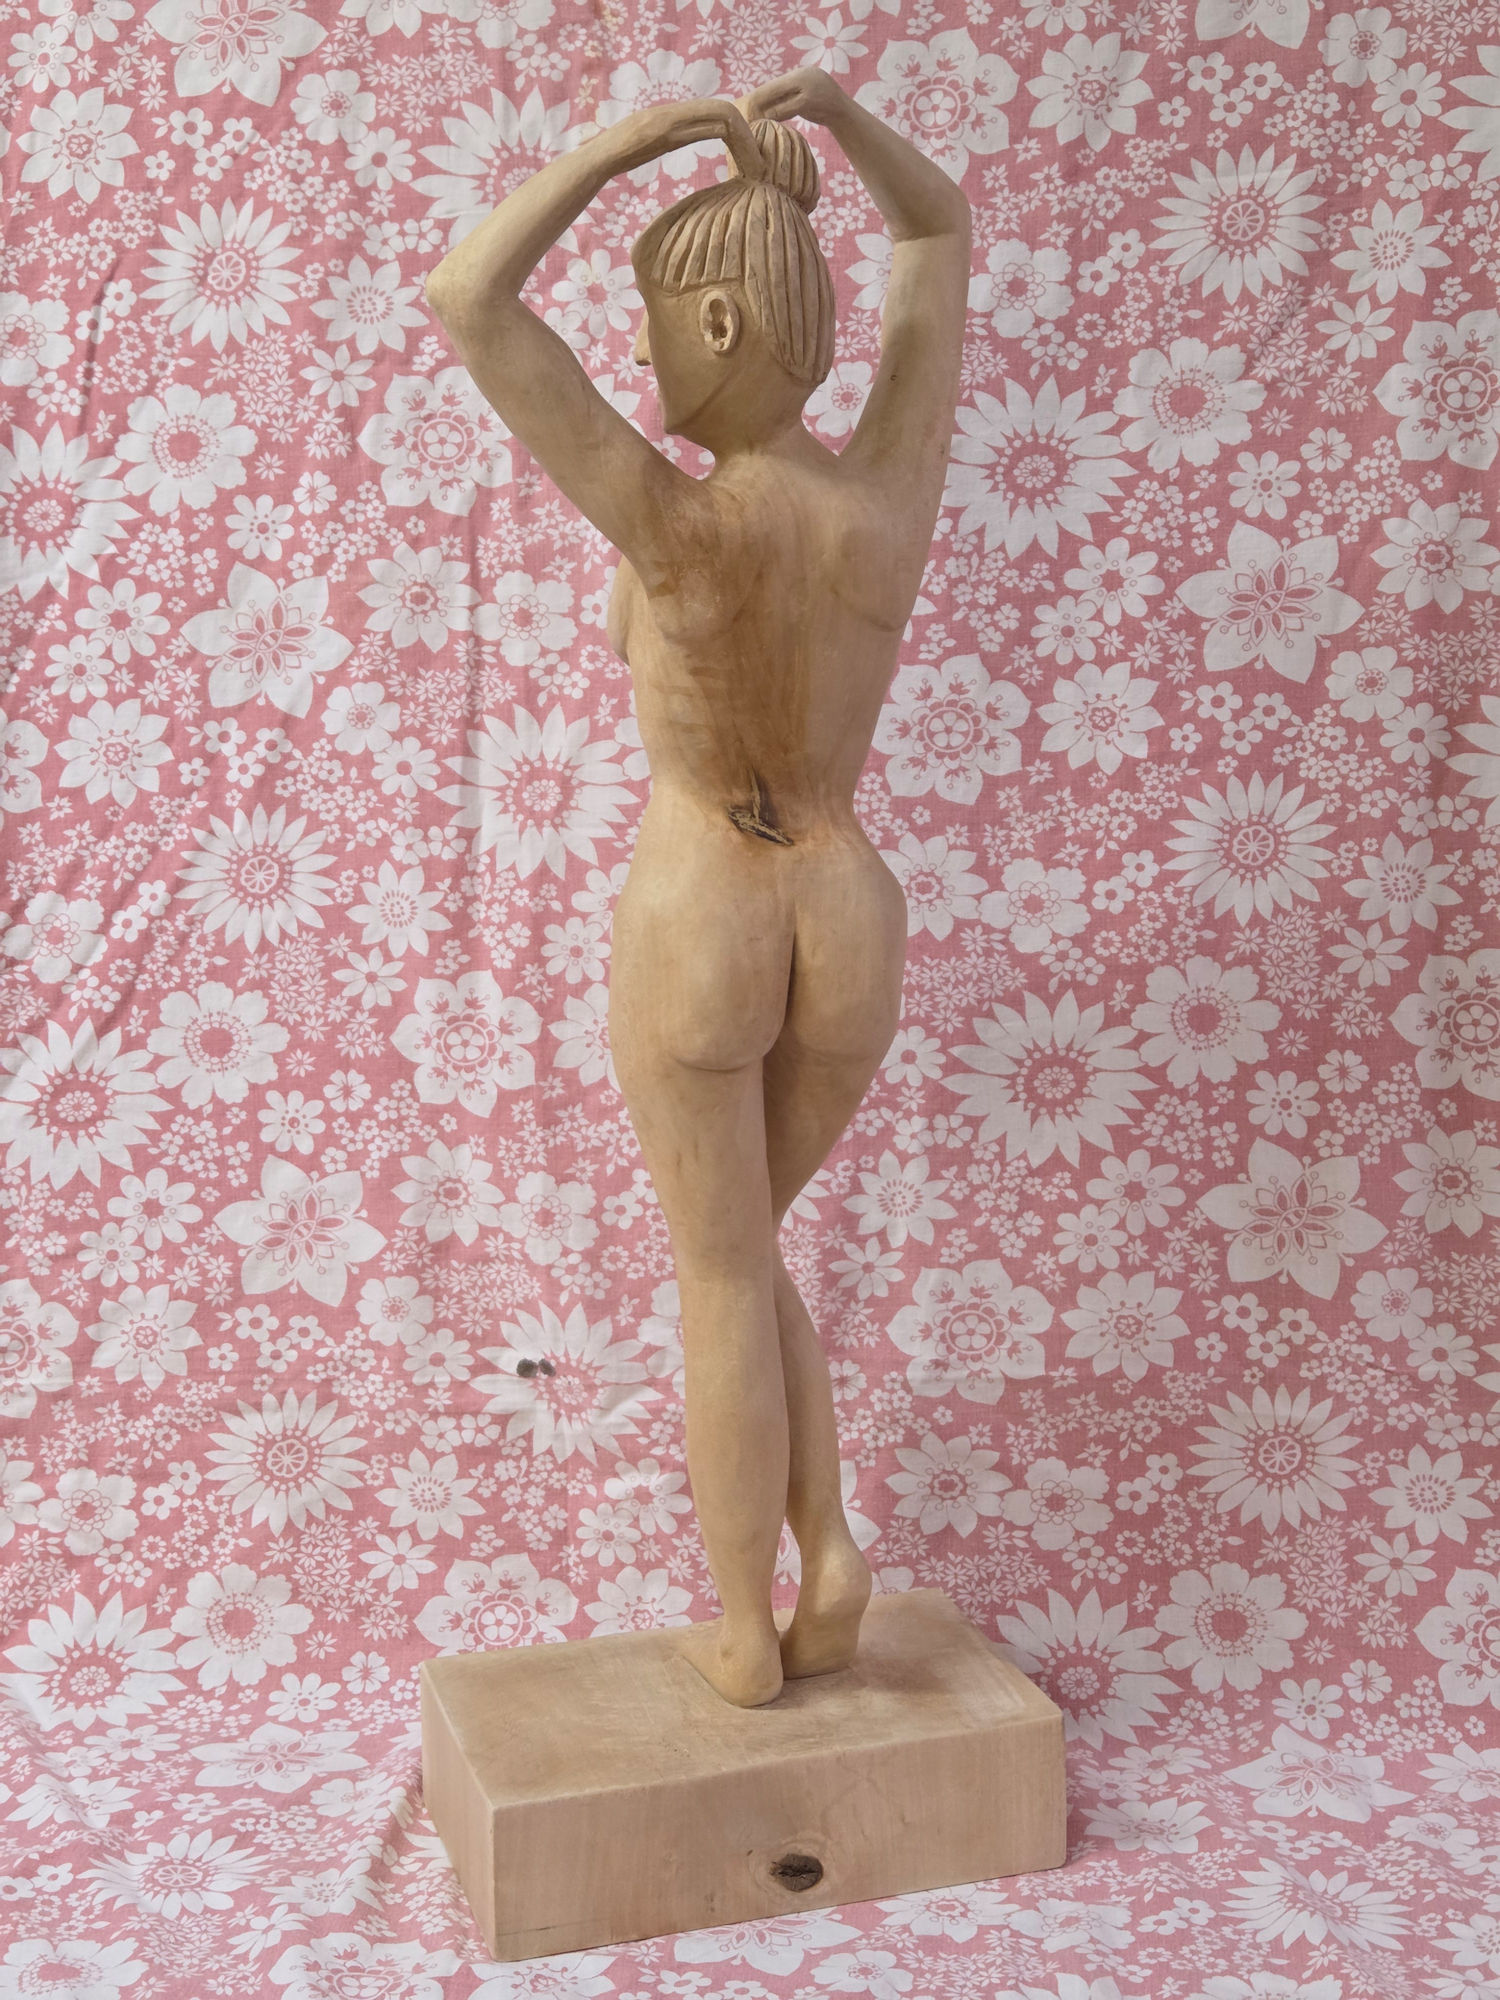
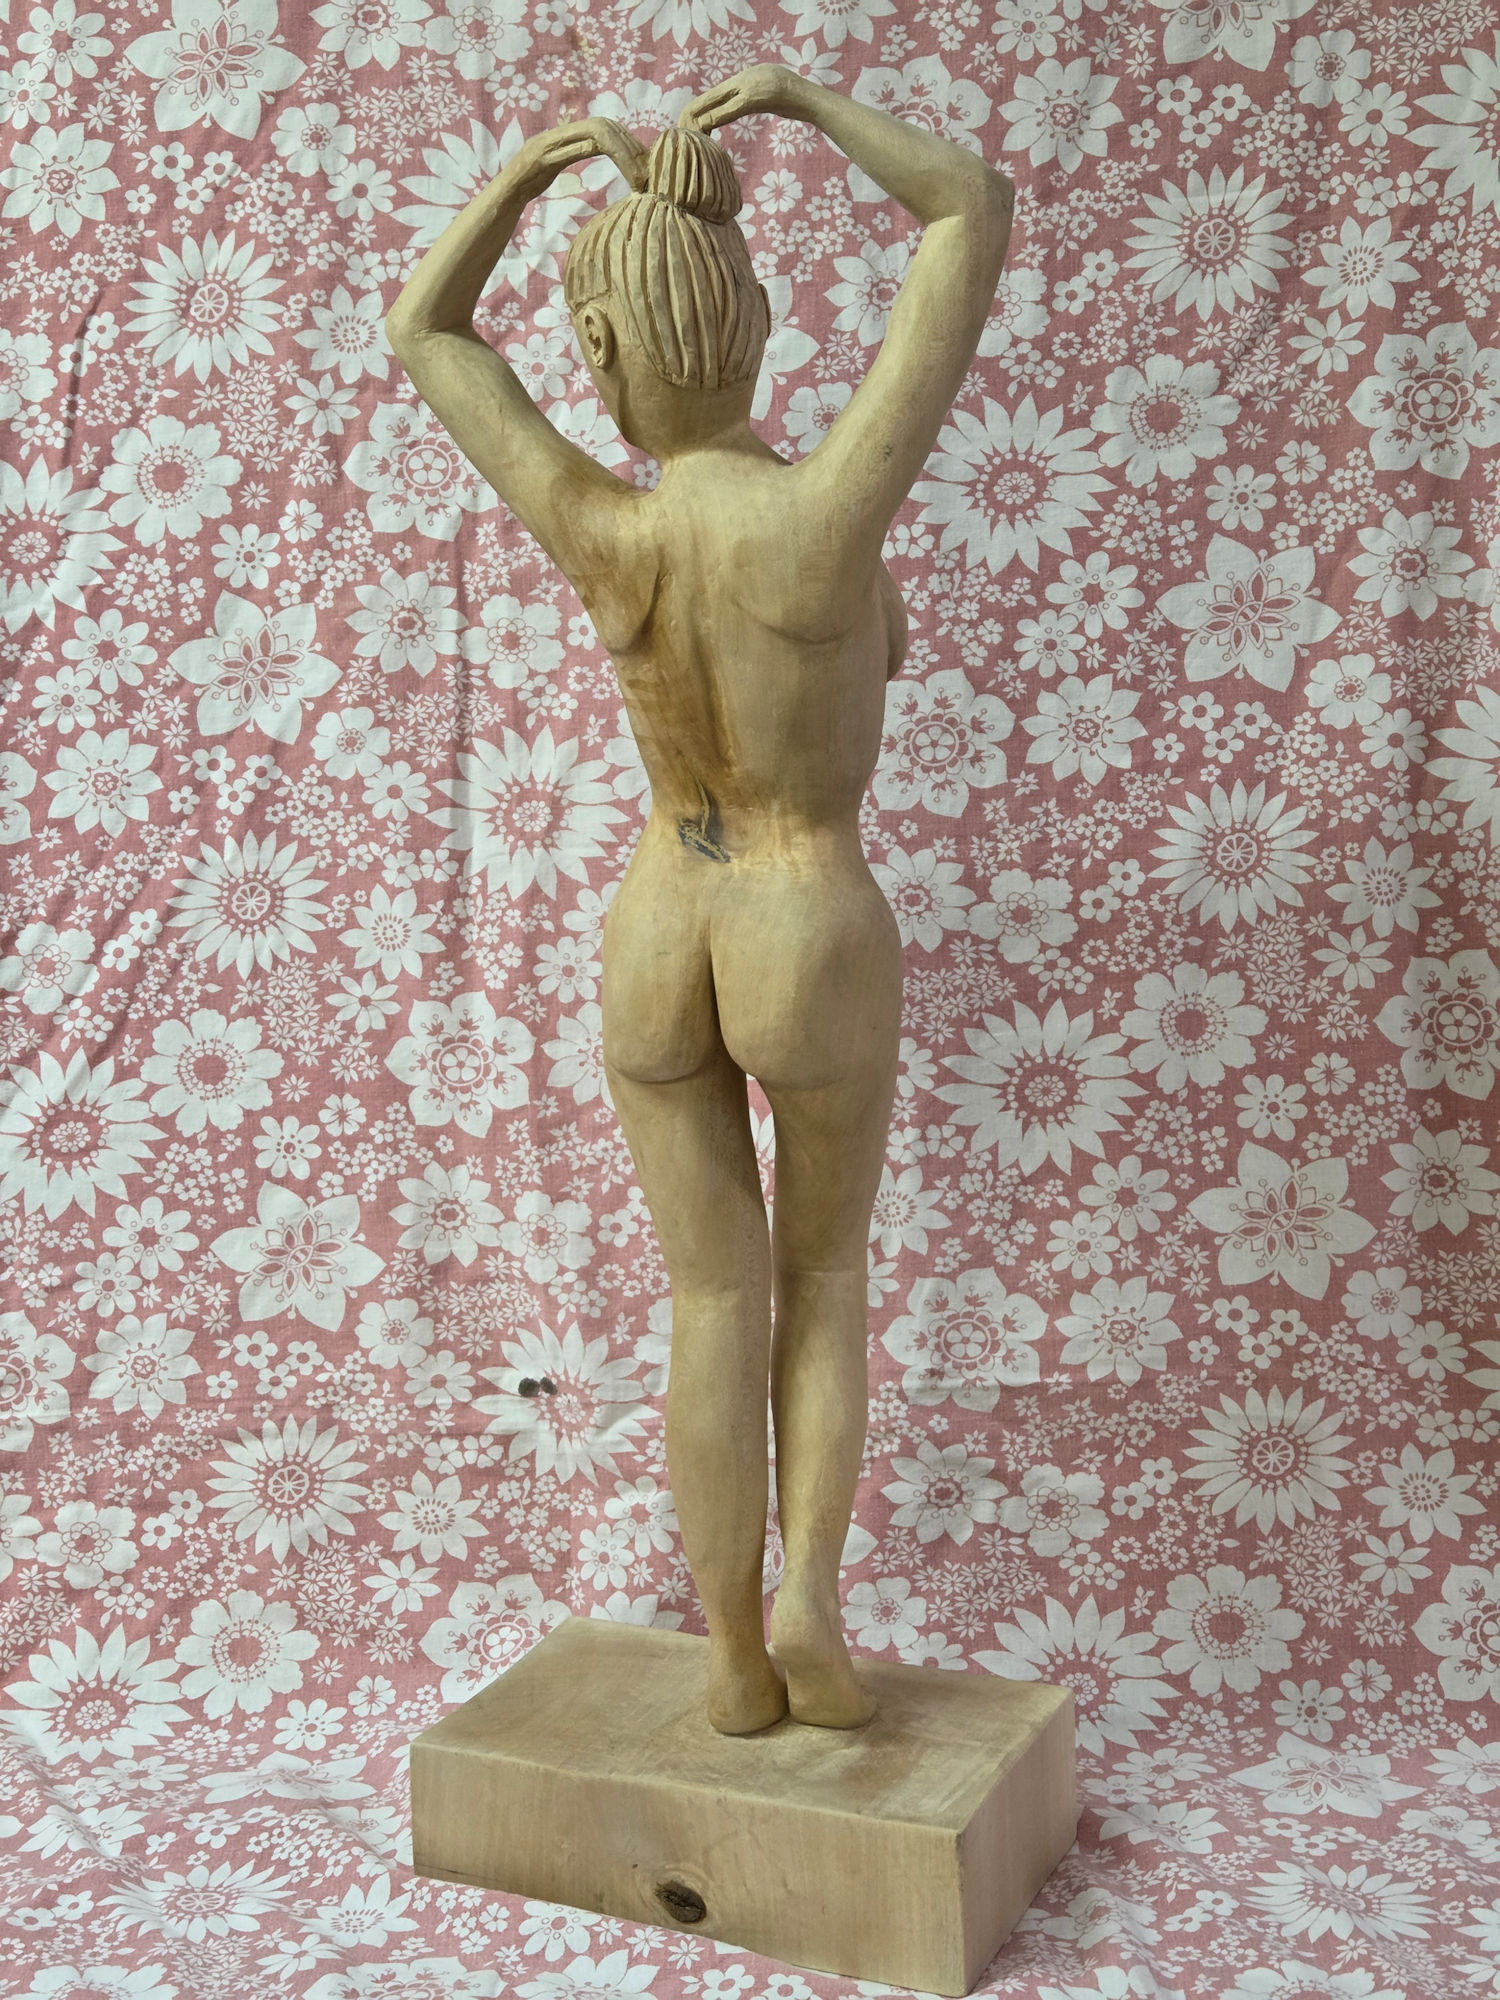
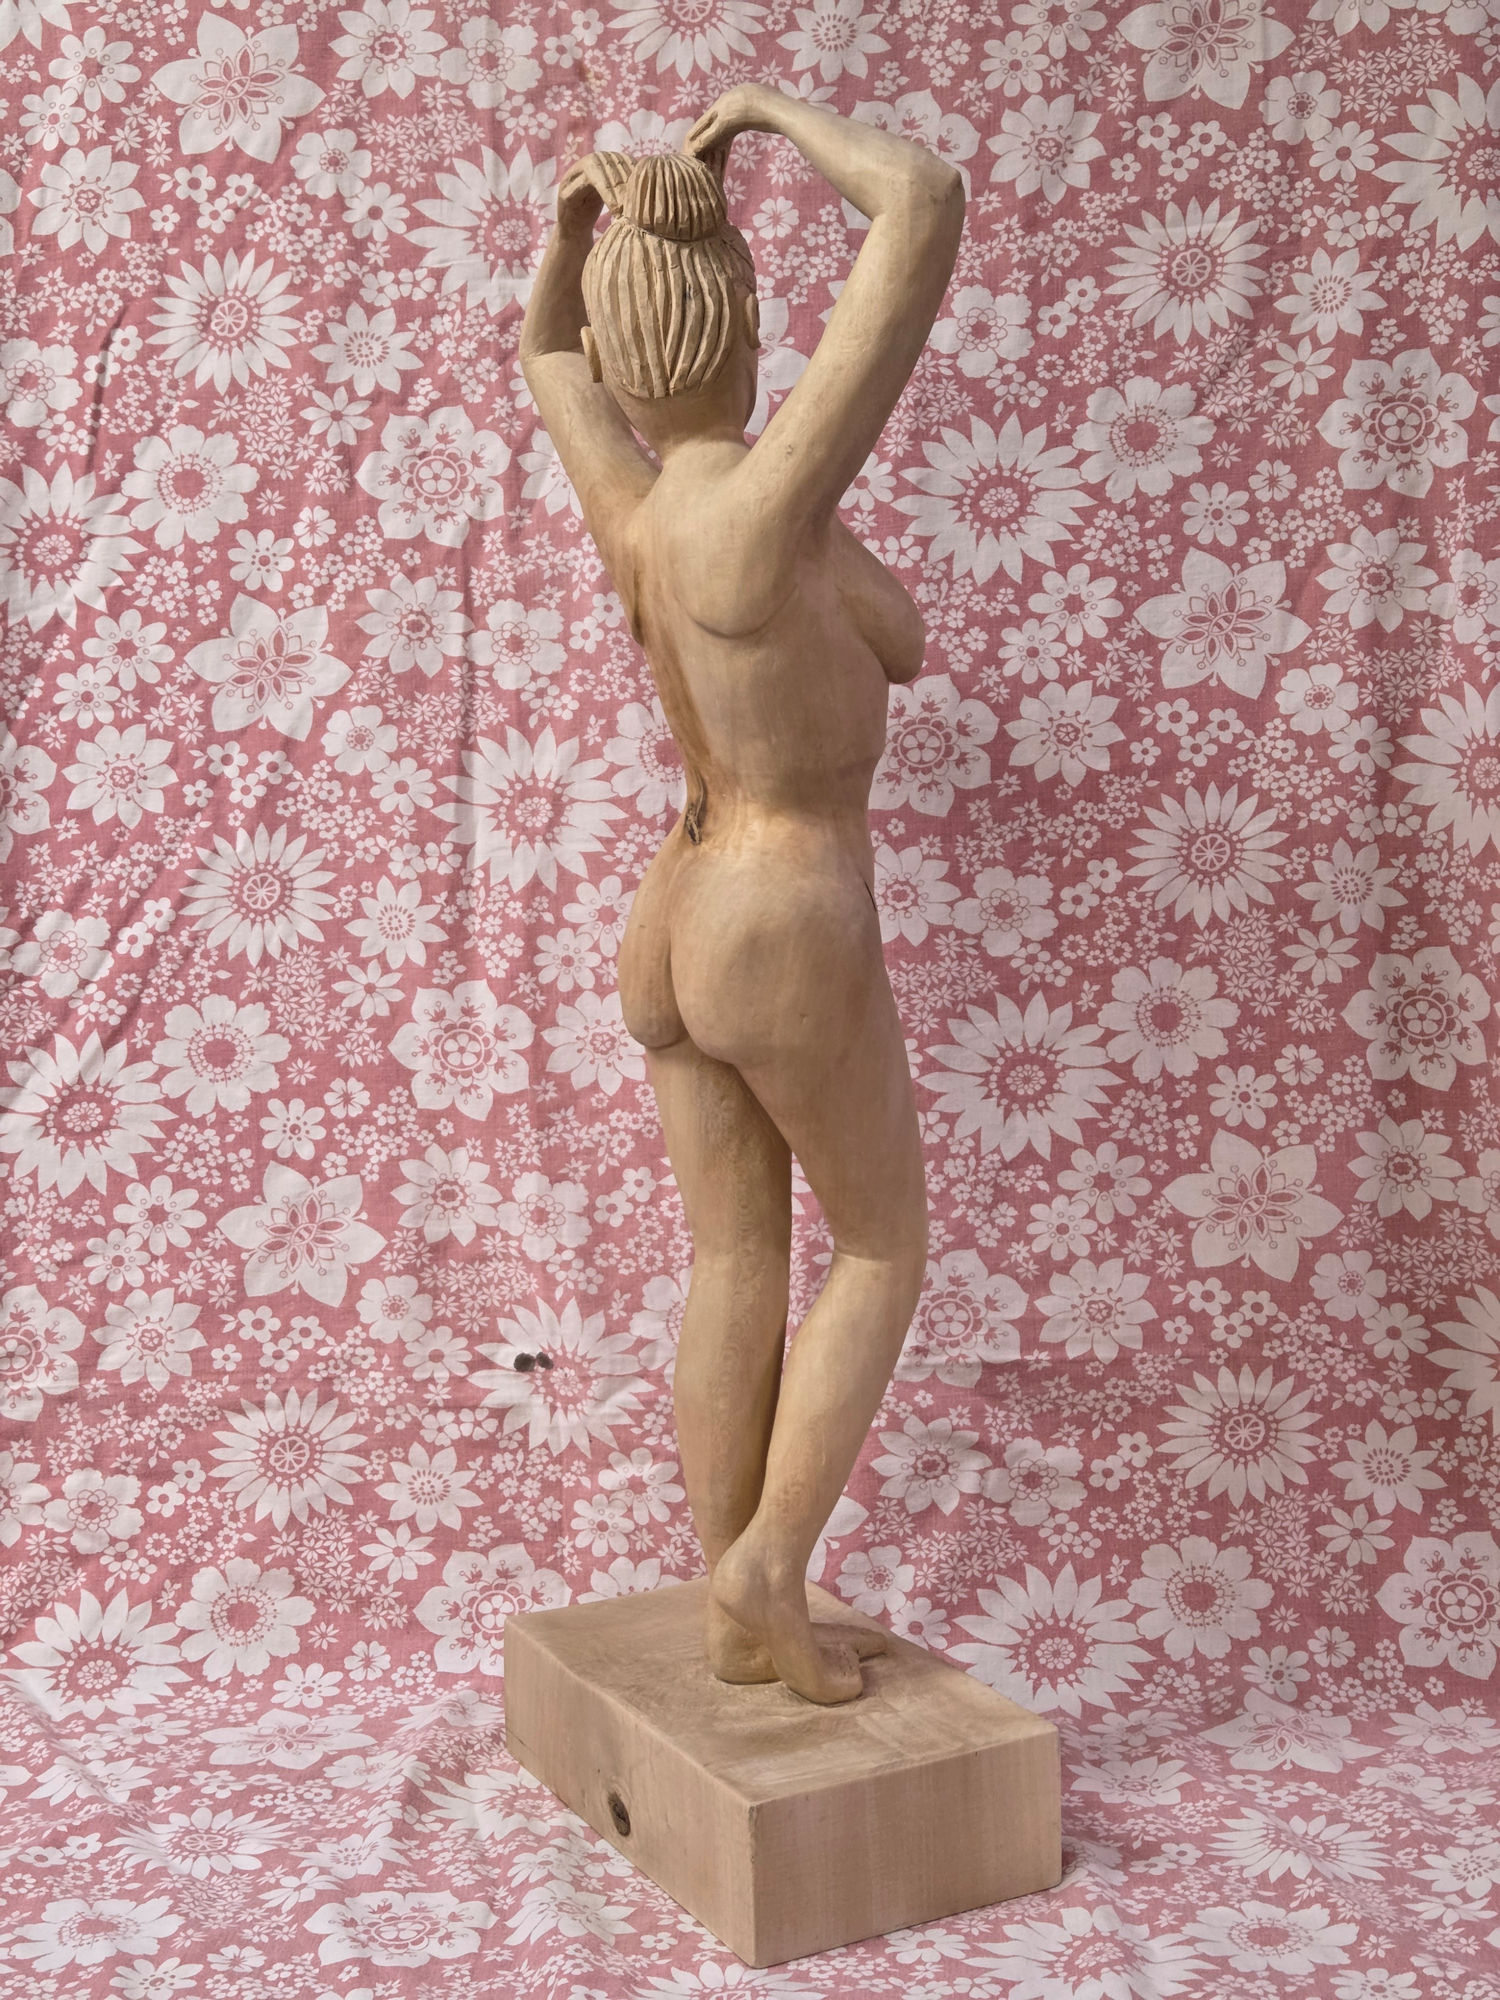
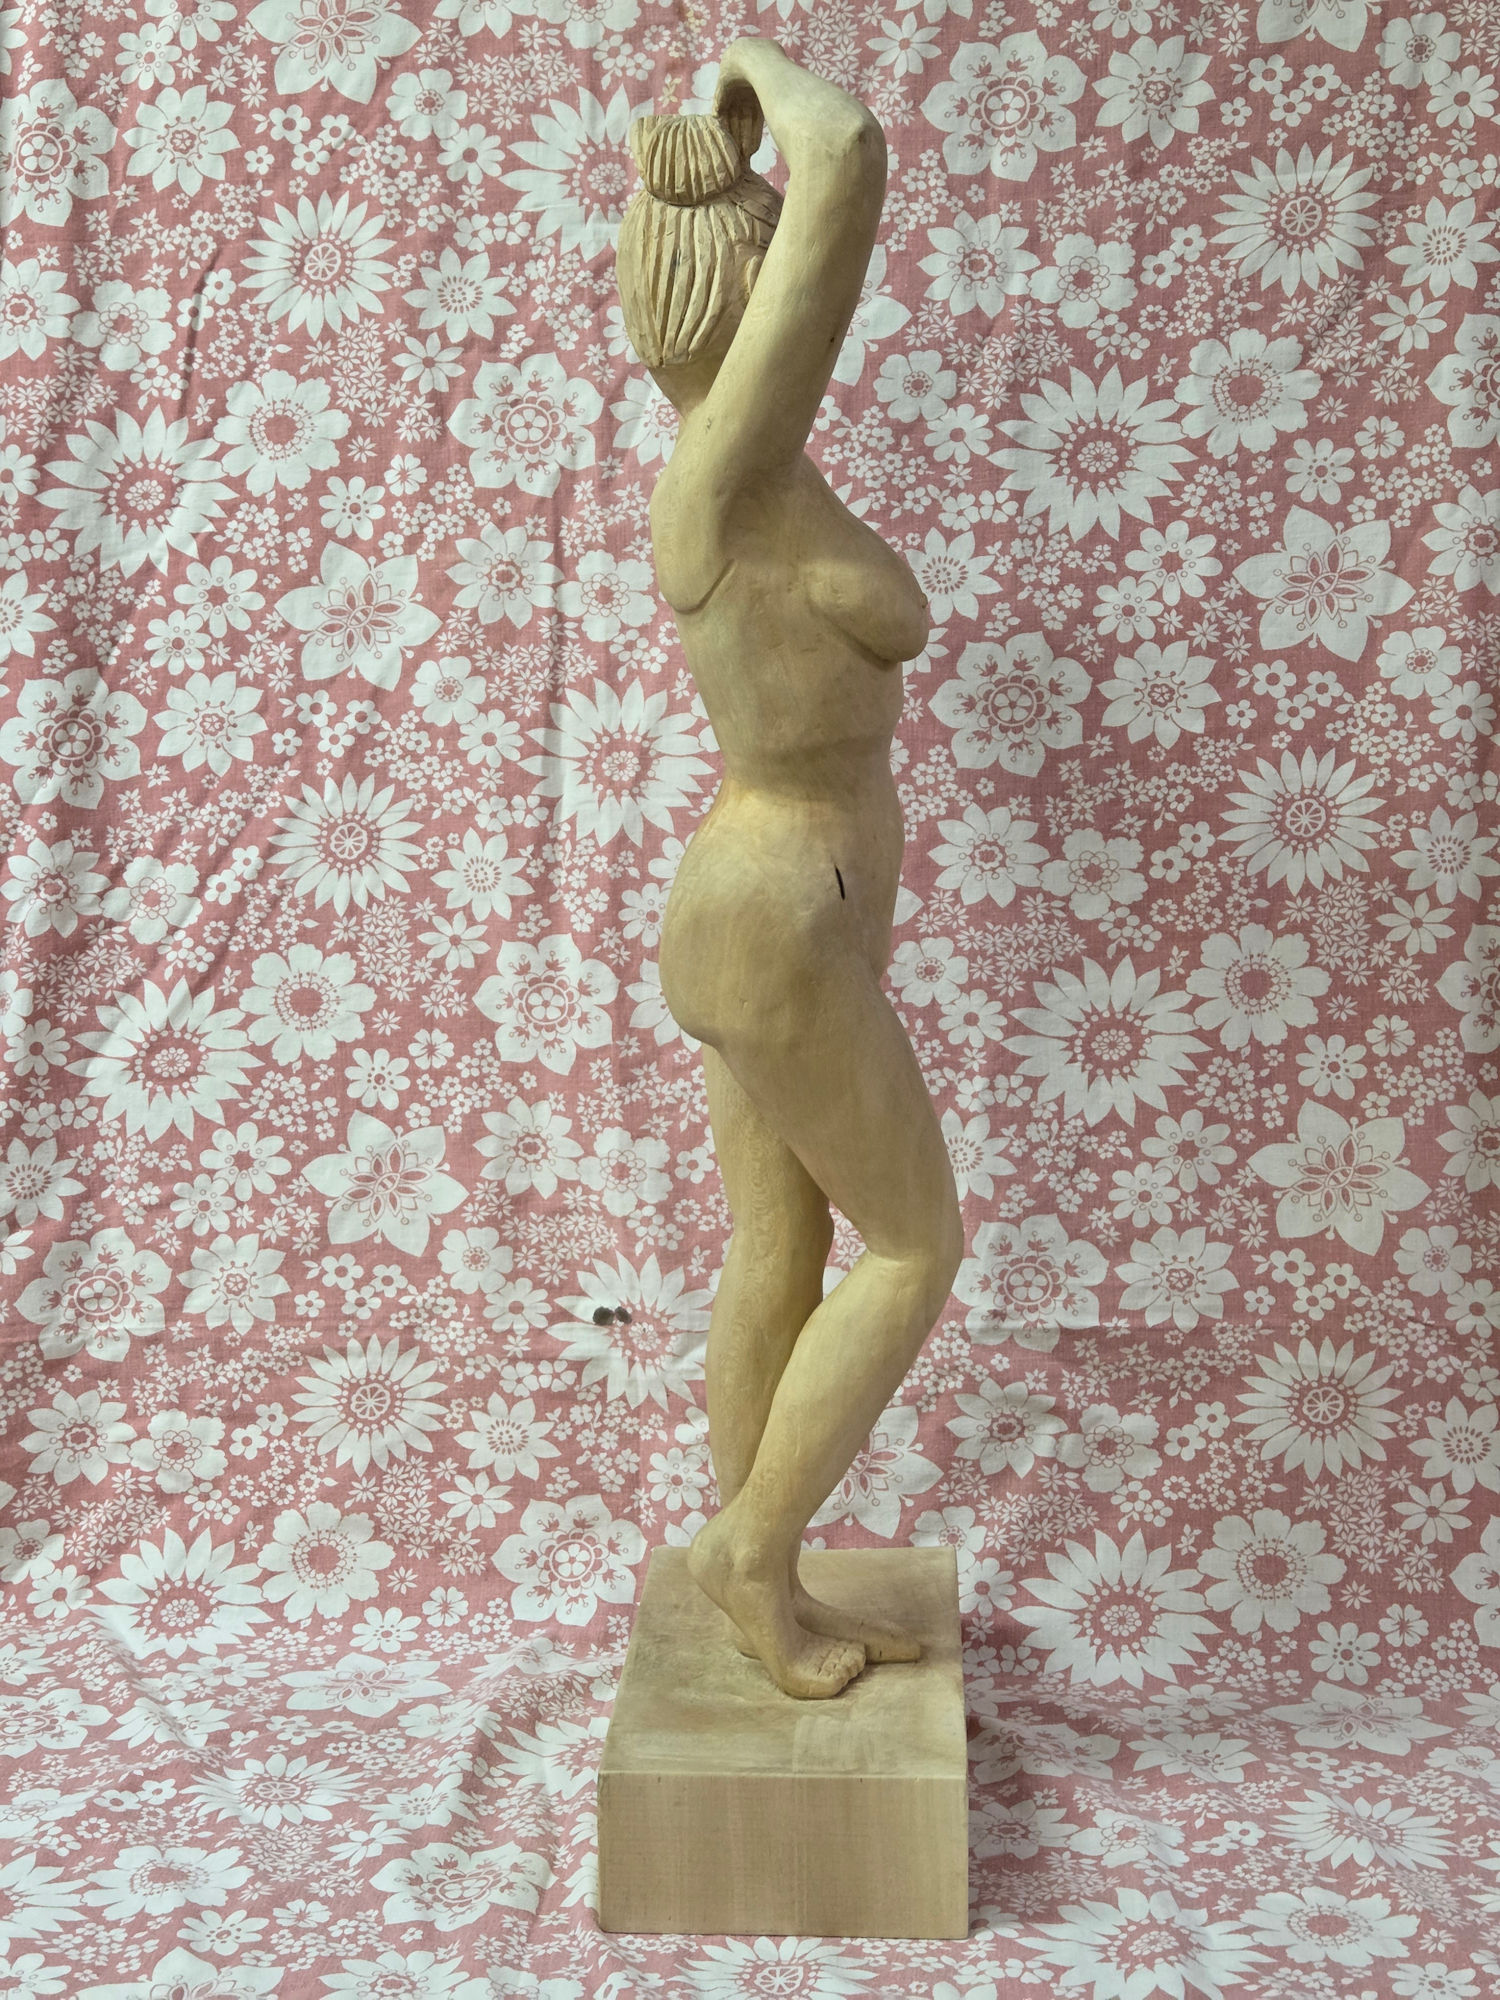
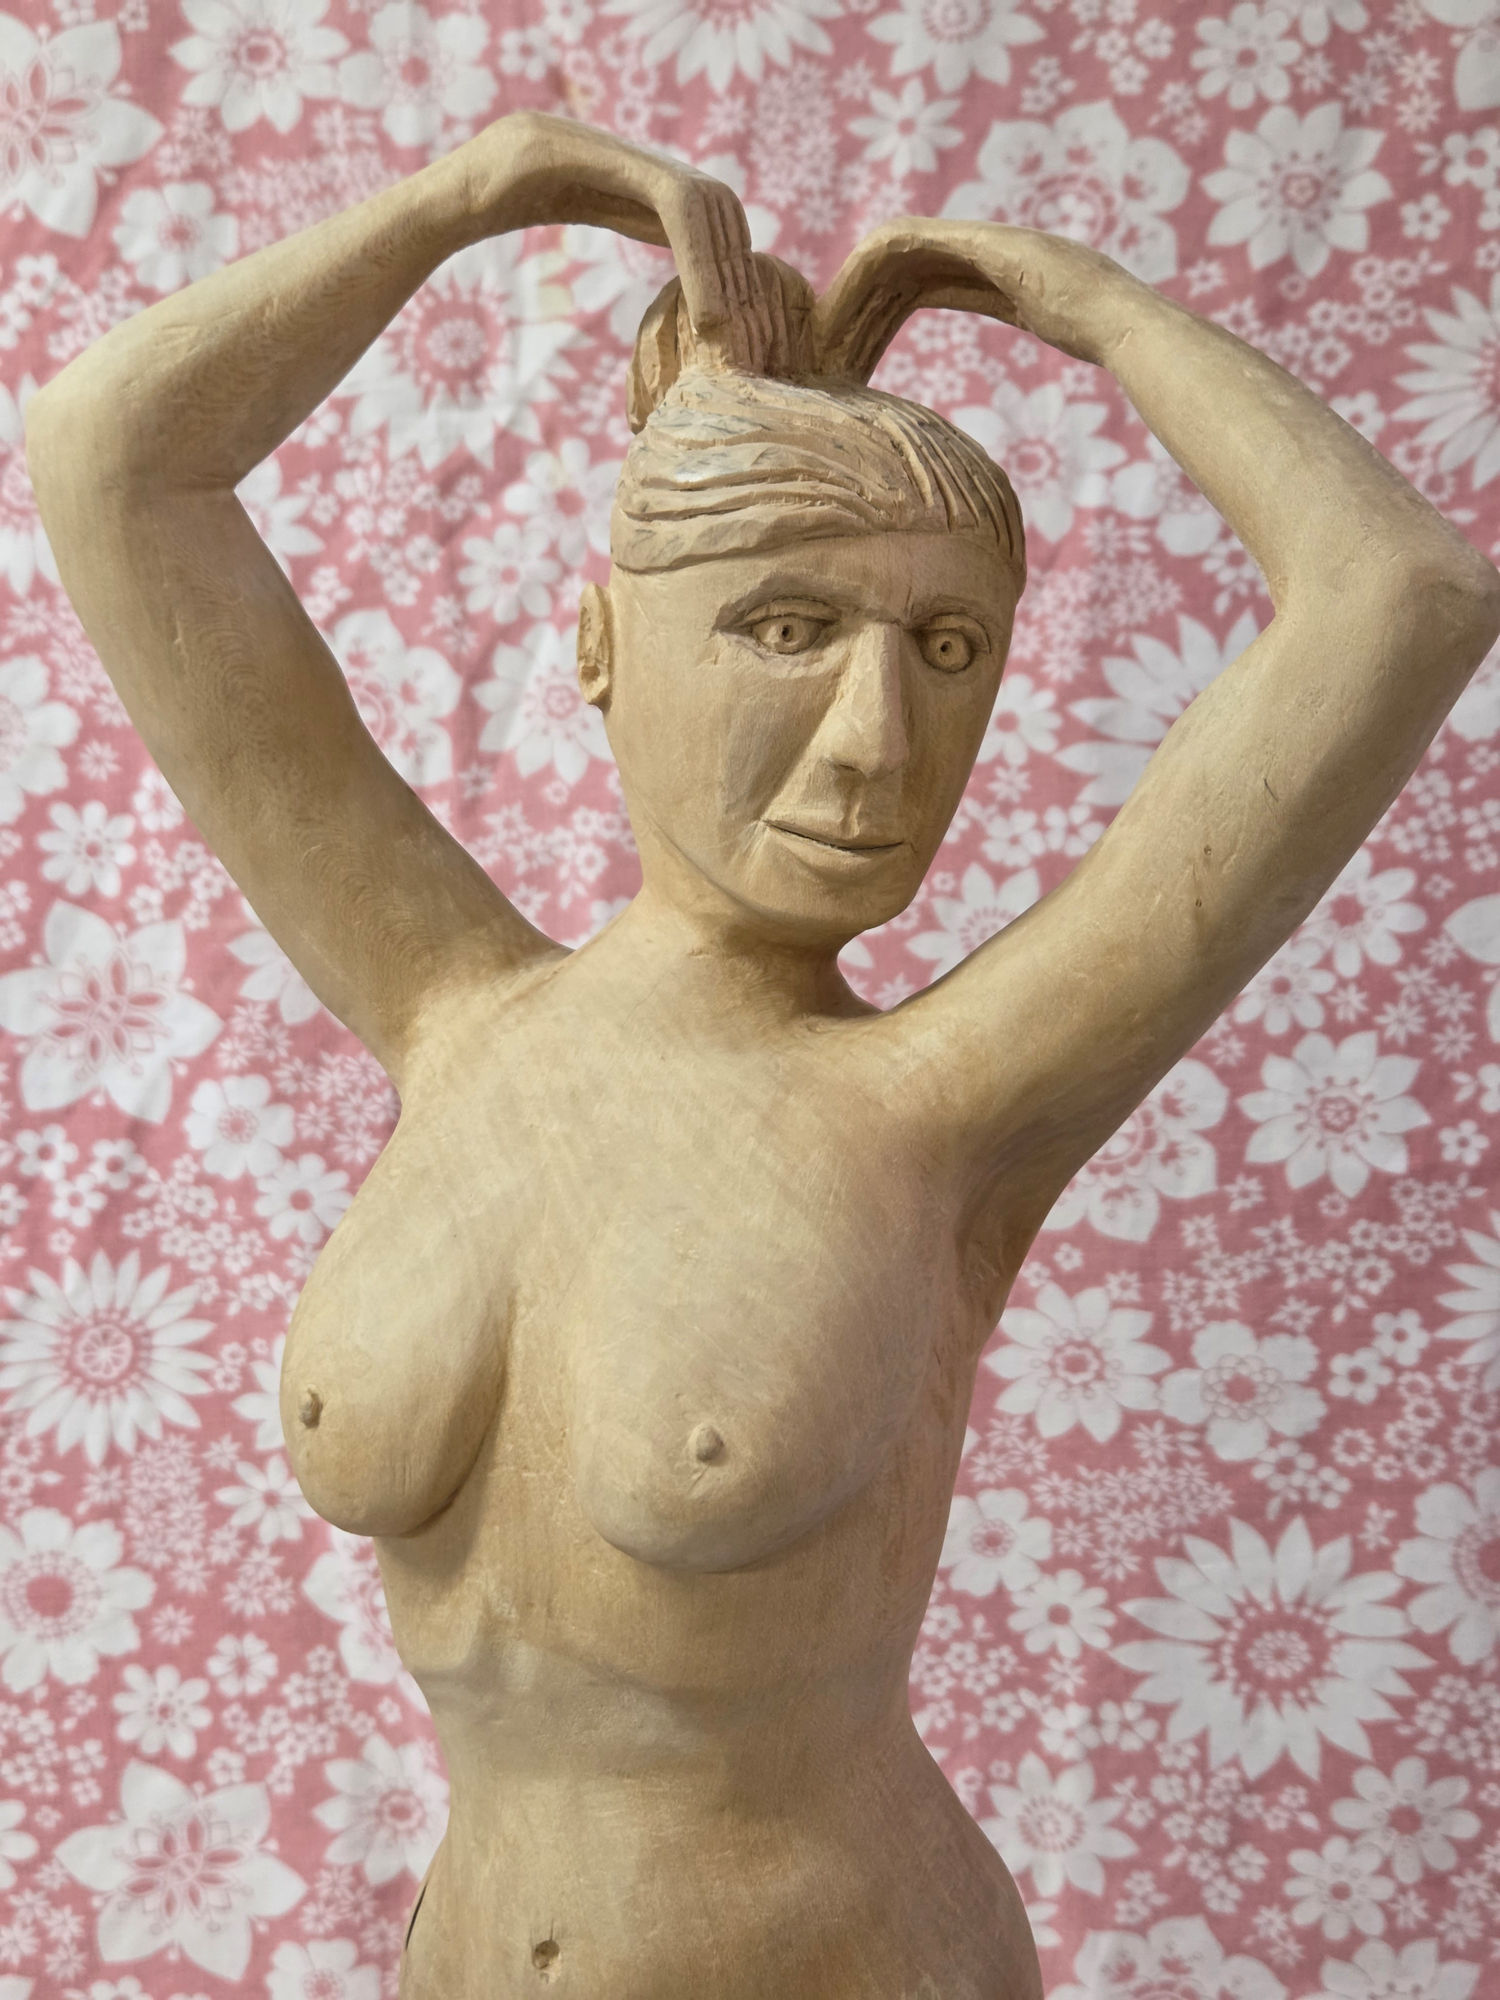
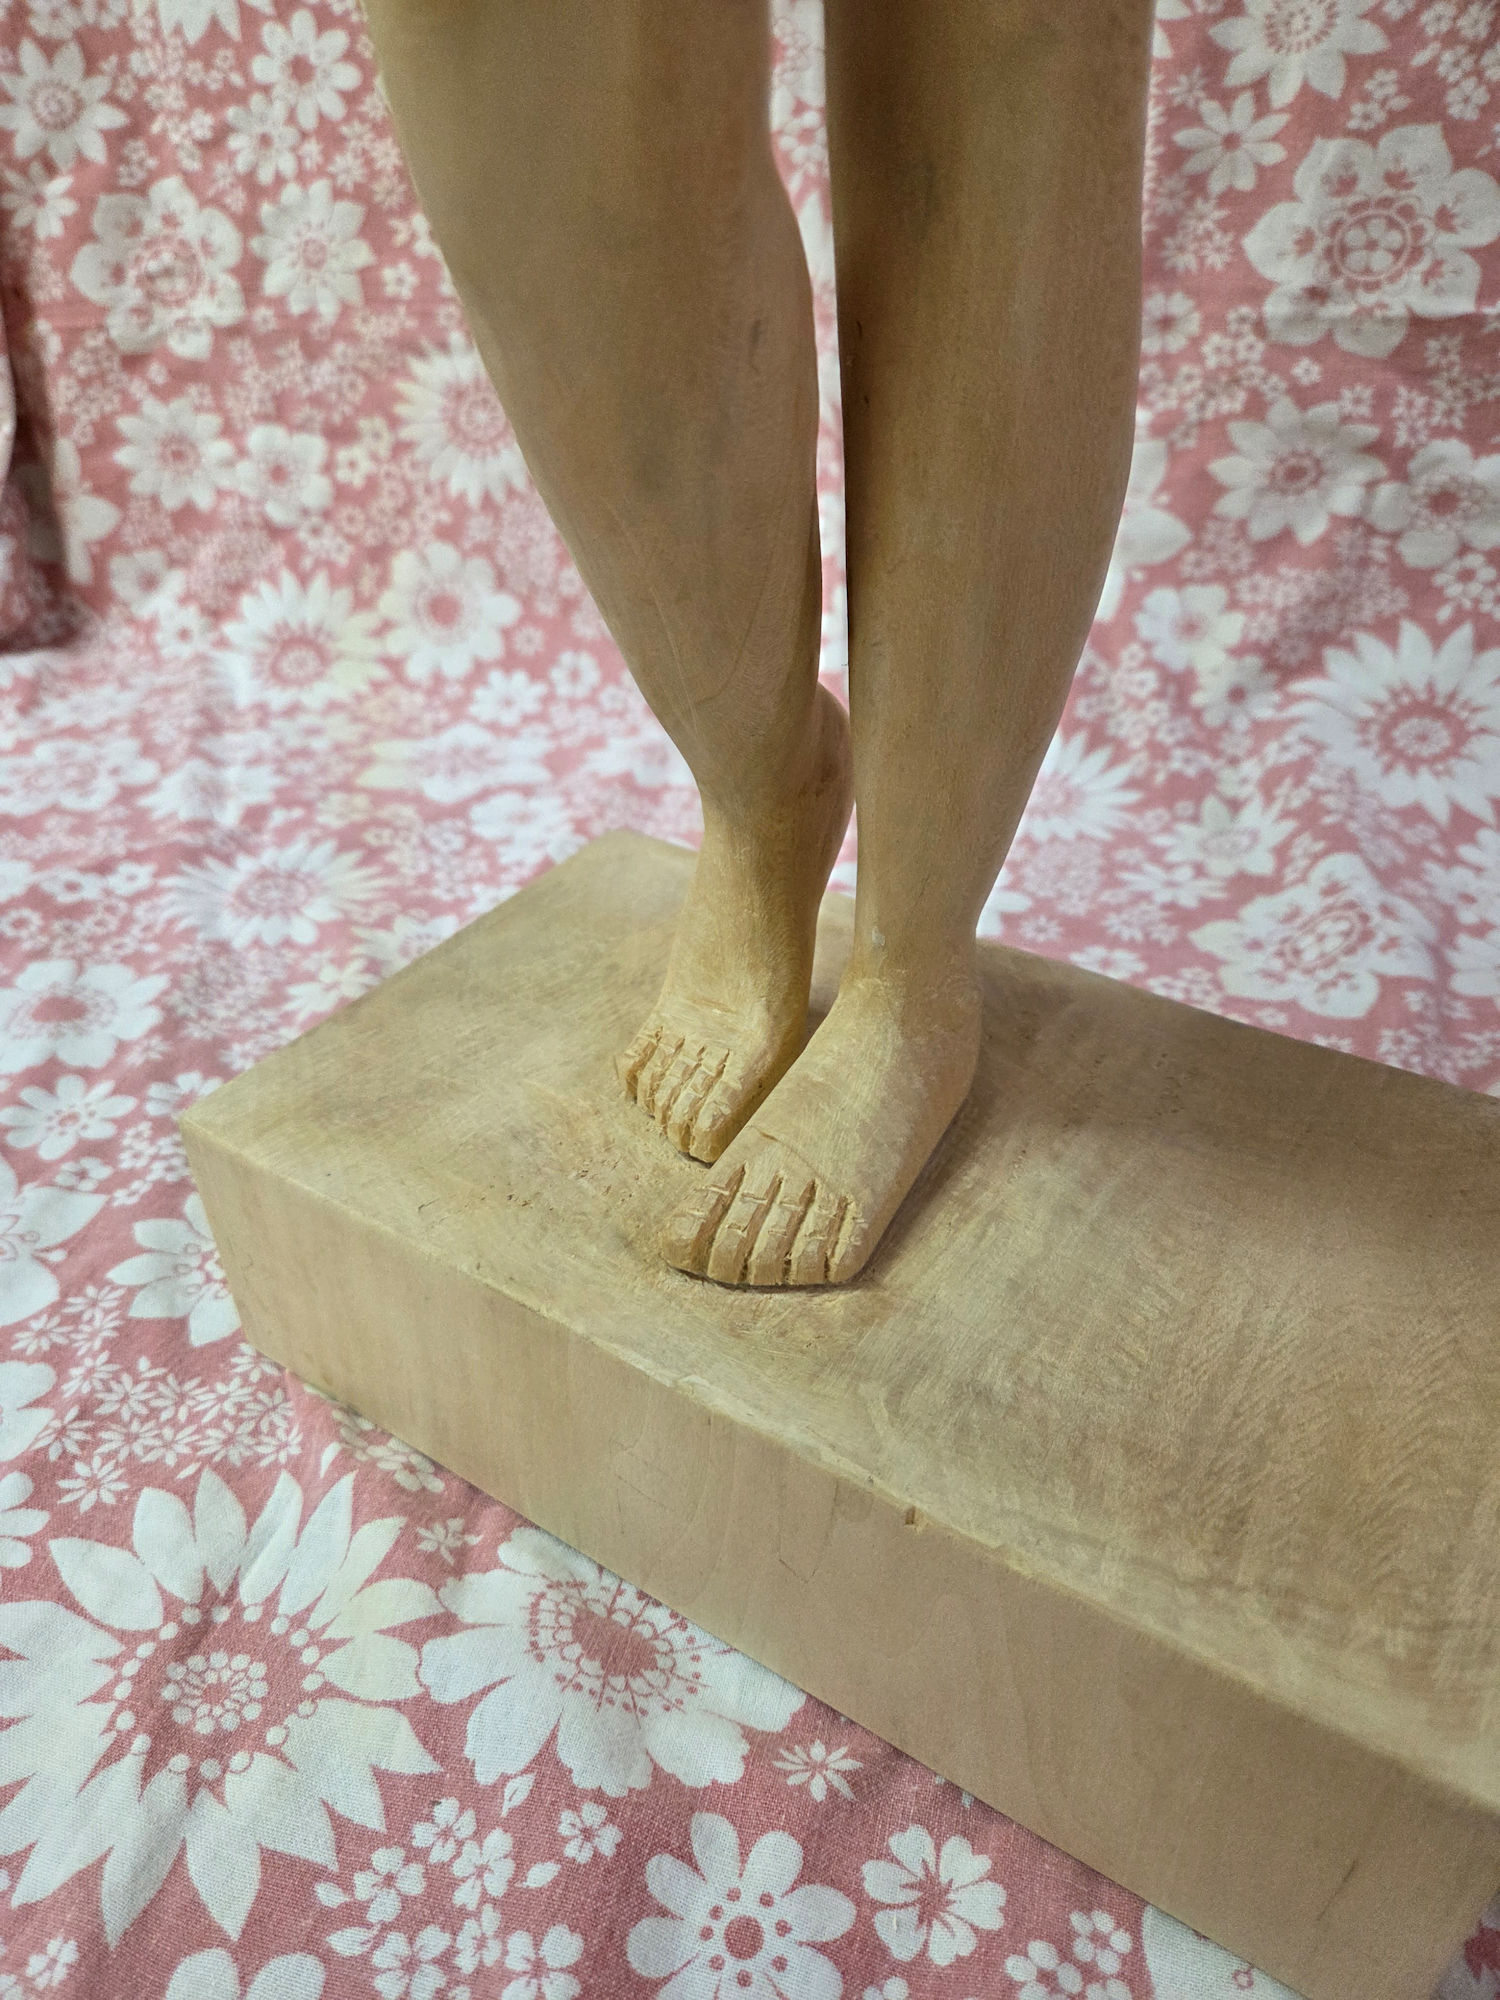
1: Book from Ian Norbury2: Front view and side view templates3: Rough basswood block hand planed to fit in planer, 22.4 kg4: Basswood block planed smooth5: Basswood block front and back planed parallel6: Basswood blank block ready for use, 10.4 kg7: Front template fitted on blank8: Left side template fitted on blank9: Right side and front traced on blank10: Front and left side traced on blank11: 9/16" auger drill bit12: Oak guide block with 9/16" perpendicular hole13: Holes next to feet for ease of band saw turning14: Holes between arms and head to ease excess wood removal15: Front of female statue cut out using the band saw, 5.1 kg16: Left side cut off is padded so that the top is horizontal when cutting of the excess17: Left side and back18: Left side and front19: Right side and front20: Right side and back21: Part of the waste; mind you that the left and right sides will be waste too after we have traced their shape onto the statue22: Preparing for the front for the excess wood removal23: Removal of excess wood at the lower front legs24: Front excess wood removal completed25: Unexpected rot revealed around left waist side26: Back waste removal completed27: The rot shows better now28: Almost done with rough wood removal29: Almost done with rough wood removal30: Rough rounded off forms31: Rough rounded off forms32: Finished rough rounded off forms33: Finished rough rounded off forms34: Finished rough rounded off forms35: Finished rough rounded off forms36: Finished rough rounded off forms37: Finished rough rounded off forms38: Finished rough rounded off forms39: Finished rough rounded off forms40: Finished rough rounded off forms41: Finished fine rounded off forms42: Finished fine rounded off forms43: Finished fine rounded off forms44: Finished fine rounded off forms45: Finished fine rounded off forms46: Finished fine rounded off forms47: Finished fine rounded off forms48: Finished fine rounded off forms49: Finished fine rounded off forms50: Lady Basswood high resolution (685 KB)51: Lady Basswood high resolution (608 KB)52: Lady Basswood high resolution (761 KB)53: Lady Basswood high resolution (819 KB)54: Lady Basswood high resolution (688 KB)55: Lady Basswood high resolution (798 KB)56: Lady Basswood high resolution (766 KB)57: Lady Basswood high resolution (825 KB)58: Lady Basswood high resolution (702 KB)59: Lady Basswood high resolution (764 KB)60: Lady Basswood high resolution (432 KB)61: Lady Basswood high resolution (577 KB)
Plans, Drawings, Sketches (inches)
Throughout the project I will refer to the page(s) of Ian Norbury's book (picture 1).
The required templates for front view and left side view I took from page 18, augmented those with the pictures on page 8, and then enlarged them to 28" height including the pedestal (picture 2).
I was told that in West Coast Haida carving you cannot use sand paper; only carving knives and chisels. For this project I will use every tool.
Materials List (inches)
no.
description
length
width
thickness
suggested basic material, comments
1
Blank block
28"
9½"
5½"
Basswood
2
sand paper
220, 320
3
Krylon
Clear Matt
4
Steel wool
Finest Nr.0000
Required Tools
Power tools -- band saw, Mastercarver Micro-Pro
Hand tools -- 9/16" auger drill bit, carving knifes, chisels, micro burrs, various grids of sand paper
Construction
To give an idea of the required construction and finishing time:
Starting date : 8-Mar-2024
Activities
hours
Blank block
5¼
Templates
4
Drill holes
3¼
Left & right sawing
5¼
Shaping front & back
2
Shaping sides
16¼
Rough rounding forms
46¾
Fine rouding forms
14¼
Last Sanding forms
13¾
Final sanding
14¾
Varnish, Finishing
2
Total time
127¼
End date : 15-Apr-2026
Making the Blank (block)
The rough basswood needed to be hand planed to make it fit in my planer machine which has a capacity of 5.9" (picture 3) and then machined down (picture 4). Picture 5 show basswood block with the front and back machine planed parallel. Next I cut of a length of 29". Then I made one side perpendicular to the front with the jointer, on the table saw I cut the blank block to the required width and make that side perpendicular to the front (picture 6). At this point the weight of the blank is only 10.5 kg.
The cut off pieces of basswood can be used for less ambitious projects.
Making the Templates
Cut studio board to the size of the front and left side of the blank. Place the templates from picture 2 on the studio board and cut out the template and studio board. Place the templates on the blank (pictures 7 and 8) and secure in place with tape.
Trace the front template onto the front of the blank. Trace the left side template onto the left of the blank. Move the left side template to the right side and trace that on the blank (pictures 9 and 10).
Band sawing the Blank
I need 9/16" perpendicular holes next to the feet for ease of band saw turning and between arms and head for ease of waste removal. However, my drill press cannot accommodate the the length of the auger drill bit (picture 11) and the thickness of the blank. My only option is to use my hand drill, but I have to make sure that the holes are perpendicular to the front surface. Hence I used a piece of oak and with the drill press I drilled a 9/16" perpendicular hole as a guide hole for the hand drill (picture 12).
Mark the spots where holes are needed on the blank. Put the blank on a sacrifice board to prevent tear out on the back side. Put the guide block on top with the guide hole where a hole is needed in the blank, and clamp everthing together. Drill the holes (pictures 13 and 14).
My band saw has a 6" capacity so I can band saw the front following the traced lines. Unfortunately, for the left side I need a 9½ band saw, which I don't have. That is why I also traced the left side template onto the right side. Carefully remove the waste from left to right or from right to left in a straight line using hand saws, chisels, etc.
Cutting out the front of the female statue was not too difficult (picture 15).
My idea is to remove the excess wood from the two side pieces and then to put them back against the statue and trace the excess areas onto the sides of the statue. In order to do that flat side of the left side has to be parallel to its bottom when we band saw the edges. We do that with filler pieces (picture 16).
After removing the excess we put the left side piece back against the left side of the statue and trace the profile onto the statue (pictures 17 and 18).
We do the same with the right side (pictures 19 and 20). Now we can add the left and right sides to the waste pile (picture 21).
Now the handwork is beginnen using chisels to remove the excess wood on the front Or as a lady friend tactfully whispered in my ear: "You are slimming the Lady Basswood." See pictures 22 to 24. Unfortunately I encountered a nasty rot around the left waist side (picture 25).
Next we remove the excess wood on the back (picture 26) and revealing the rot even better (picture 27).


